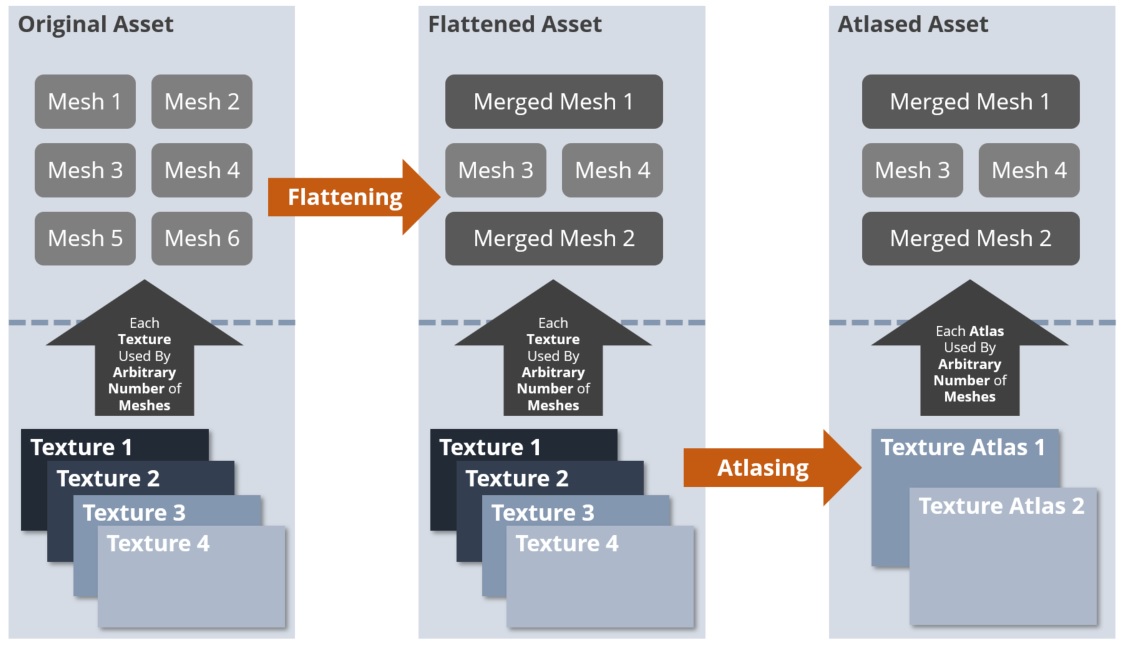
In this tutorial we are going to explore the available atlasing modes of RapidCompact. Different atlasing modes allow us to configure how RapidCompact should create new texture images for the optimized model. The atlasing mode can be changed through the setting compact:atlasingMode.
| Name | Type | Default | Valid Range | Quick Description |
|---|---|---|---|---|
| compact:atlasingMode | String | separateAlpha | {'single', 'separateAlpha', 'separateNormals', 'separateAlphaNormals', 'separateMaterials'} | mode used to assign meshes to atlases |
There are five different options:
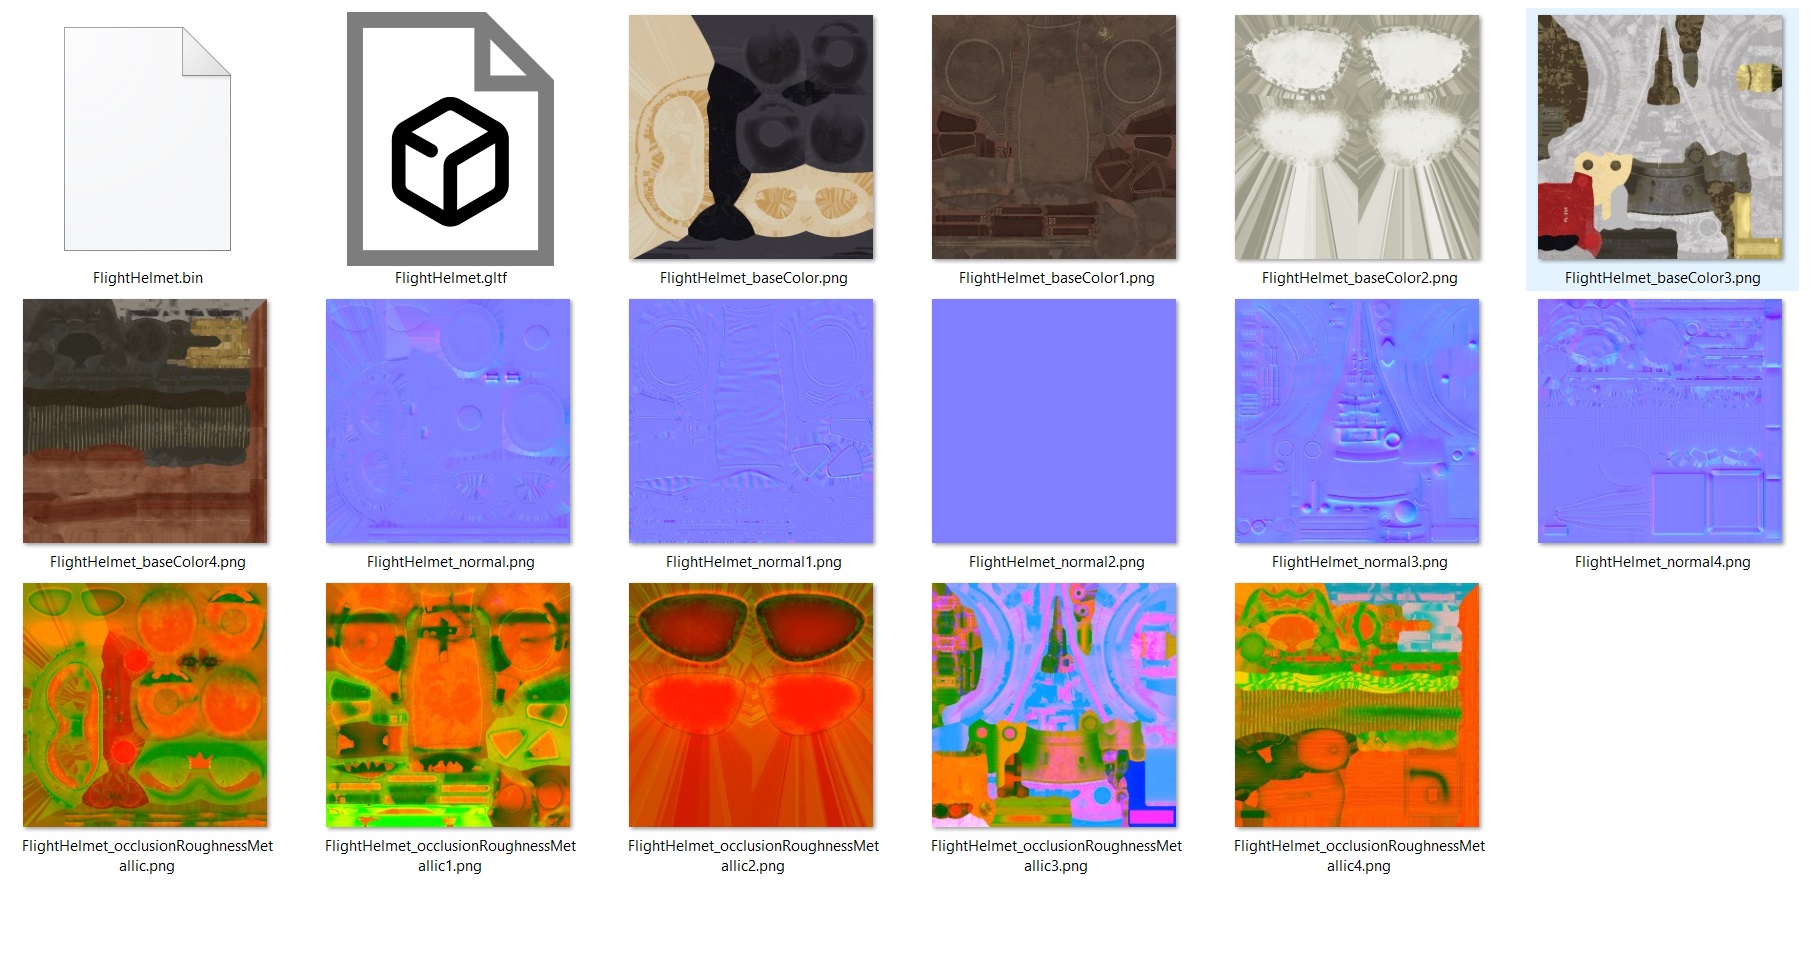
As an example file we will again use the FlightHelmet asset. You can download the glTF file here.
Let us first have a look at the number of input atlases:
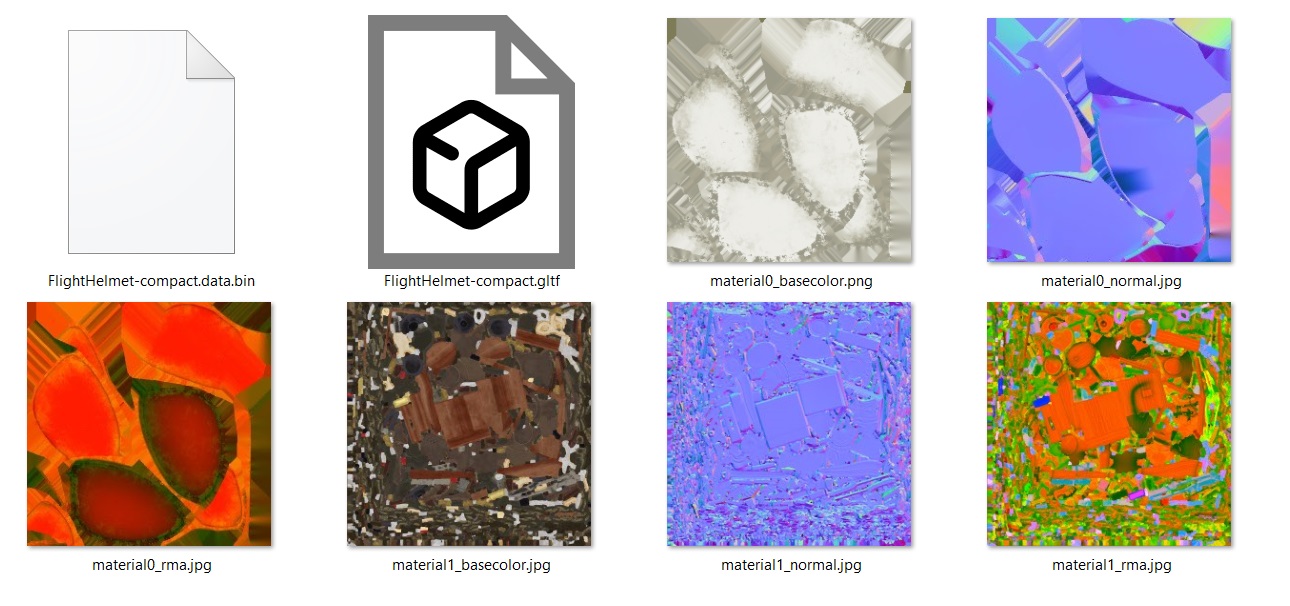
Now optimize the asset to 25% of the original faces using just the default settings of RapidCompact:
rpdx -i .\FlightHelmet.gltf -c f:25% -e compact/FlightHelmet-compact.gltf
To get an overview on how RapidCompact scales down the textures according to the surface area in the 3d space, have a look at the following settings available under compact and baking in the config file:
| Name | Type | Default | Valid Range | Quick Description |
|---|---|---|---|---|
| compact:pixelsPerUnitLength | Real | 0 | {0 .. inf} | number of pixels per unit length (e.g. per meter) |
With compact:pixelsPerUnitLength, you can control the automatic texture scaling algorithm of RapidCompact. To enable it, set the setting to a value greater than zero. Once enabled, RapidCompact will then make sure that the resulting maps produce at least the given amount of pixels per spatial unit, when applied to the 3D surface. Example: If your 3D model is given in meters and you set compact:pixelsPerUnitLength to 1000, this means that one square meter of the model would be textured with 1000 x 1000 pixels of texture. Naturally, this method can produce textures that are not having a power-of-2 size (see respective paragraph below).
Above we have seen how to scale texture maps automatically, following their projected 3D size - using compact:pixelsPerUnitLength. Alternatively, when setting compact:pixelsPerUnitLength to zero, we can simply specify a fixed overall number of texels (texel budget) to use for the texture atlases, or, alternatively, specify a single, fixed resolution for all atlases. Naturally, the latter automatic method can produce textures that are not having a power-of-2 size (see respective paragraph below). The following setting allows us to choose between the latter two modes:
| Name | Type | Default | Valid Range | Quick Description |
|---|---|---|---|---|
| baking:fixedAtlasResolution | Flag | false | {true, false} | if false, each texture's pixel budget is divided by all atlas |
This setting will work together with other settings like baking:baseColorMapResolution. When set to false, instead of blindly using the same, specified size for all textures (e.g., for all base color maps), it allows us to still introduce some adaptivity, as in the flight helmet example above, by creating maps of different sizes following their scale on the 3D surface. Example: Let's take the flight helmet asset again, and let's say baking:baseColorMapResolution is set to 2048. When setting baking:fixedAtlasResolution to true, each and every resulting base color texture will then have a size of 204x2048 pixels. However, when setting it to false, the overall budget of 2048x2048 pixels will be spread out amongst the resulting maps, proportional to the space they cover in 3D. A map for the wood and leather parts, for example, will get way over 1000x1000 pixels assigned, while a map for the glasses will have a substantially size, and their areas, when summed up, will in the end all add up to around 2048x2048 pixels.
| Name | Type | Default | Valid Range | Quick Description |
|---|---|---|---|---|
| compact:powerOfTwoTextures | String | ceil | {'none', 'ceil', 'floor', 'round'} | compact ensures that textures have power of two dimensions |
Once texture sizes have been computed automatically, according to the value given via compact:pixelsPerUnitLength or by disabling baking:fixedAtlasResolution, the setting compact:powerOfTwoTextures controls the way RapidCompact chooses the final resolutions for the baked and exported textures. As a default value, there is ceil, which makes sure the resolutions are snapped to the next higher power-of-2 size (eg. from 1023x1023 to 1024x1024, instead of 512x512). The opposite setting would be floor (snapping to the next lower power-of-2 size), and the more adaptive setting is round (snapping to the closest power-of-2 size, can be lower or higher). RapidCompact is also able write out textures with non-power-of-2 resolutions, which is usually more precise with respect to the desired resolution in 3D, but not supported on all rendering platforms. You can choose to disable power-of-2 scaling completely with the setting none, which will produce textures that have the exact optimal resolution that was automatically computed by RapidCompact.
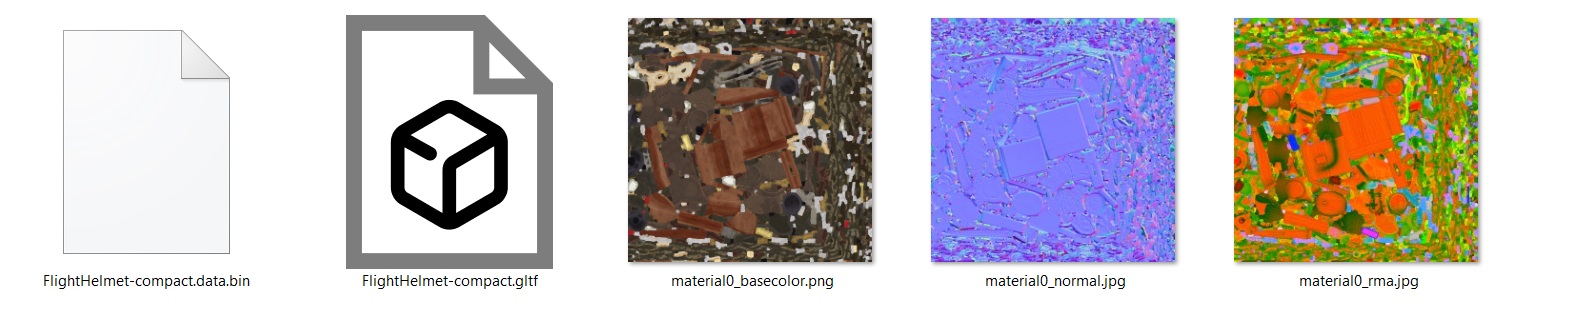
If it is desired to only bake one single atlas in total, but still differenciate between opaque and transparent materials (important for the correct render queue, etc.), we can simply use the atlasing mode single :
rpdx -i .\FlightHelmet.gltf -s compact:atlasingMode single -c f:25% -e compact-single/FlightHelmet-compact.gltf
In some cases we may want the number of resulting atlases to correspond 1:1 to the number of input materials (one atlas per material). To achieve this, we use the atlasing mode separateMaterials, in combination with the scene flattening mode byMaterial, to make sure all materials stay separate throughout the optimization process:
rpdx -i .\FlightHelmet.gltf -s flattening:mode byMaterial -s compact:atlasingMode separateMaterials -c f:25% ...
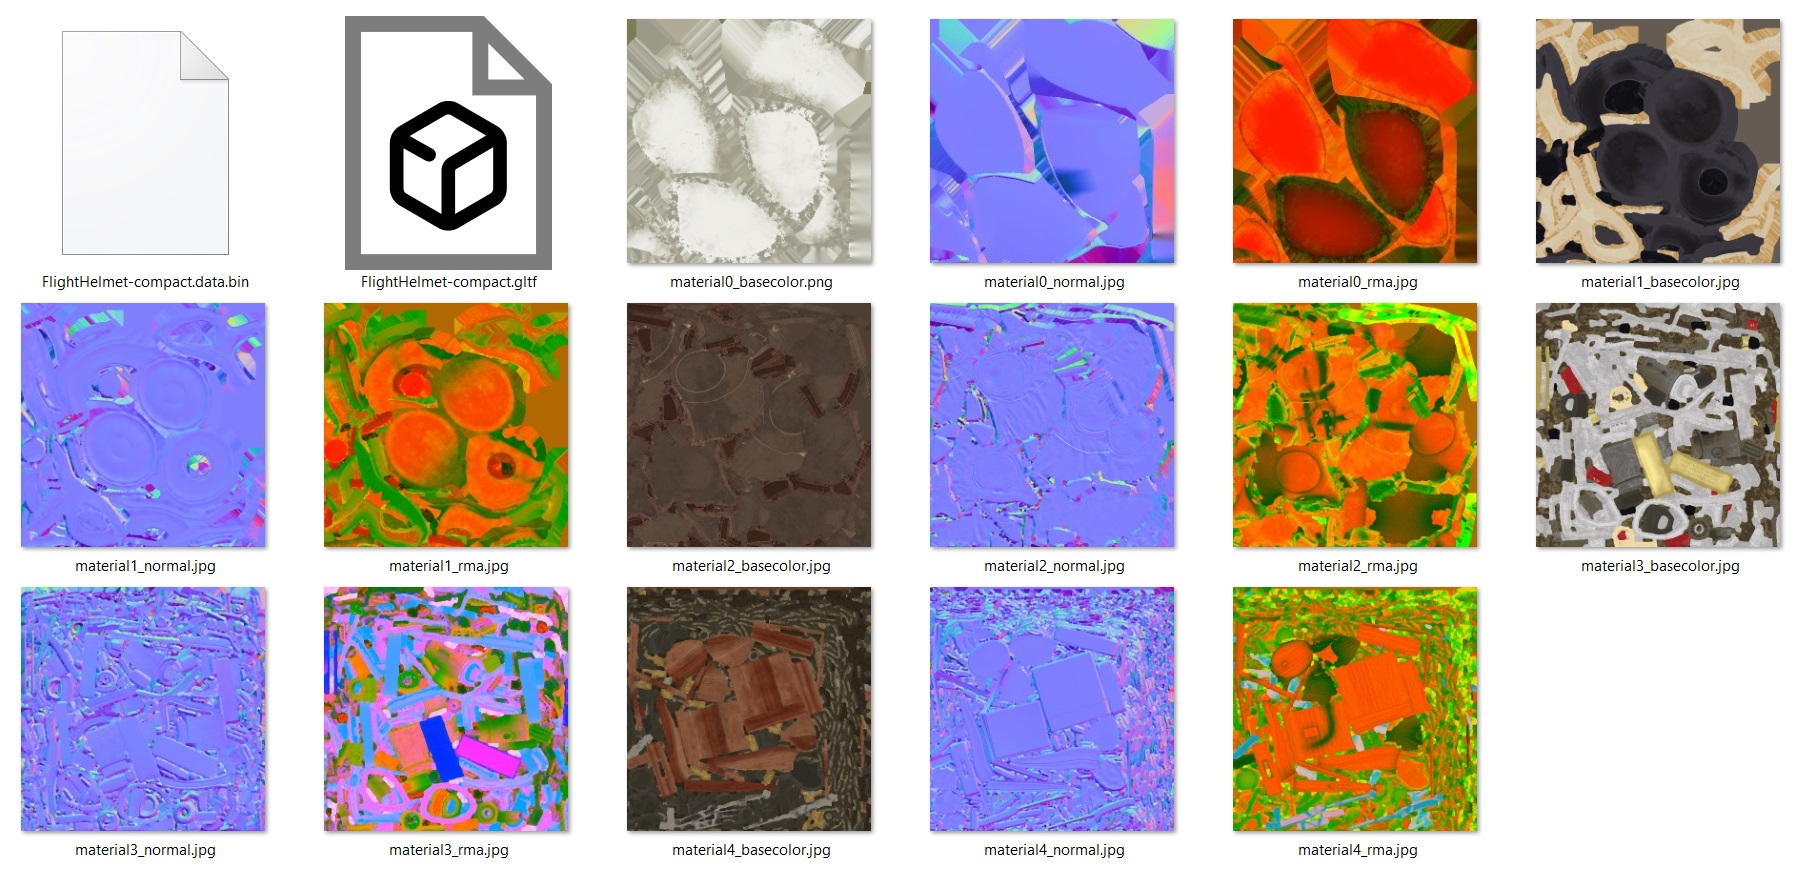
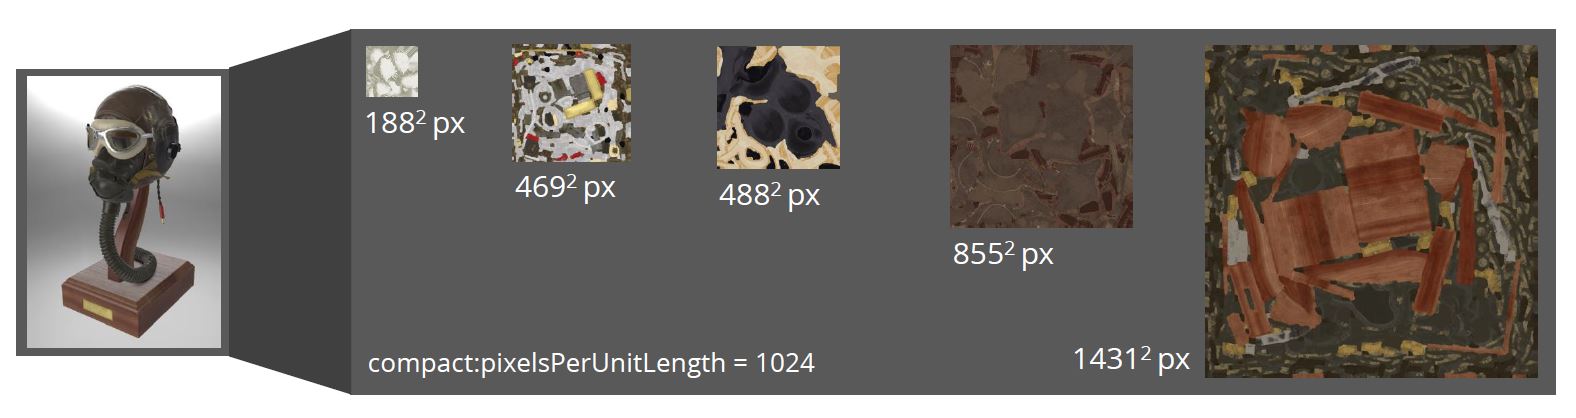
To put it all together, we can have a look at the flight helmet example and optimize it with the following four settings:
With those settings, we have decided to keep all input meshes separate (flattening:mode none), and also to create a separate atlas for each of their materials (compact:atlasingMode separateMaterials). We have also disabled power-of-2 textures (compact:powerOfTwoTextures none), so that resulting textures will be scaled exactly to match the desired resolution of 1024 pixels per unit on the 3D surface (compact:pixelsPerUnitLength 1024). The result looks like the following: