Since it can easily be installed on servers an does not require a GPU, RapidCompact CLI can also be conveniently used to generate images of 3D models. This is useful, for example, when you have a large set of meshes and want to create thumbnail images. You can also use RC to render a turntable-like image series, rotating around the up-axis of a given mesh. Such an image series can then be used to display a pseudo-3D view of a 3D model (for example, inside a Web page). Image generation (or rendering) commands share the following common settings:
| Name | Type | Default | Valid Range | Quick Description |
|---|---|---|---|---|
| rendering:enableDropShadow | Flag | true | {true, false} | turns rendering of drop shadow on/off |
| rendering:showBackFaces | Flag | false | {true, false} | turns rendering of backfaces on/off |
| rendering:imageHeight | Int | 1024 | {1 .. 16384} | height to be used for rendered images |
| rendering:imageWidth | Int | 1024 | {1 .. 16384} | width to be used for rendered images |
| rendering:sampleCount | Int | 4 | {1 .. inf} | number of samples per pixel for image rendering |
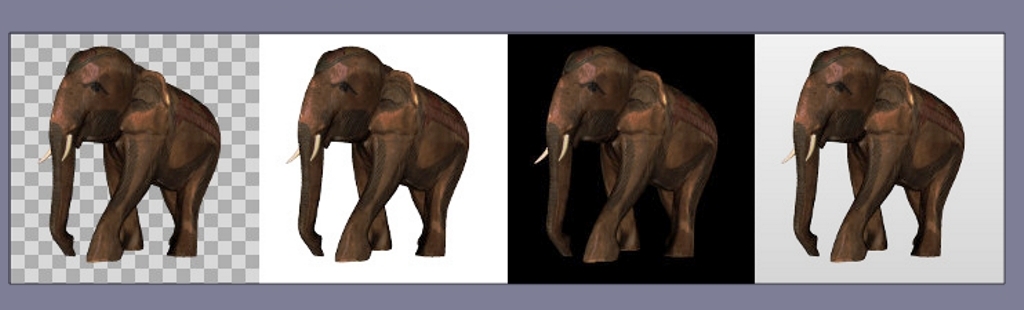
| rendering:background | String | transparent | {'transparent', 'white', 'black', 'gradientGray', 'vignette'} | background to be used for rendered images |
| rendering:cameraPosition | String | auto | auto | camera position vector for rendering |
| rendering:cameraUpVector | String | 0 1 0 | camera up direction for rendering | |
| rendering:cameraViewVector | String | 0 0 -1 | camera direction vector for rendering | |
| rendering:shadingMode | String | pbr | {'pbr', 'wireframe', 'flat', 'diffuse'} | rendering method |
In the following, commands for generating images are shown:
| Command: | render_image |
| Shorthand: | none |
| Argument: | filename of the resulting image file |
| Example: | rpdx -i myMesh.ply --render_image mesh.png |
| Description: | Renders an image of a mesh and stores it to the given image file. Supported image formats are PNG and JPEG. |
| Command: | render_turntable |
| Argument 1: | directory for images |
| Argument 2: | number of views / images to render |
| Example: | rpdx -i foo.obj --render_turntable meshTT 32 |
| Description: | Renders a turntable-like image series by centering the asset and rotating the view around the up-axis. The resulting images will be stored in PNG format. |
If a model should be rendered using a certain camera position and orientation, the following command set_view_matrix can be used:
| Command: | set_view_matrix |
| Shorthand: | v |
| Argument: | matrix in format "m00 m01 m02 m03 m10 m11 m12 m13 m20 m21 m22 m23" |
| Example: | rpdx -i foo.obj -v "1 0 0 0 0 1 0 0 0 0 1 -1000" --render_image foo.png |
| Description: | Sets the view matrix, used for rendering, to the given matrix. The 3x4 matrix in row major format must be specified as a single, whitespace-separated string, wrapped in quotes. |
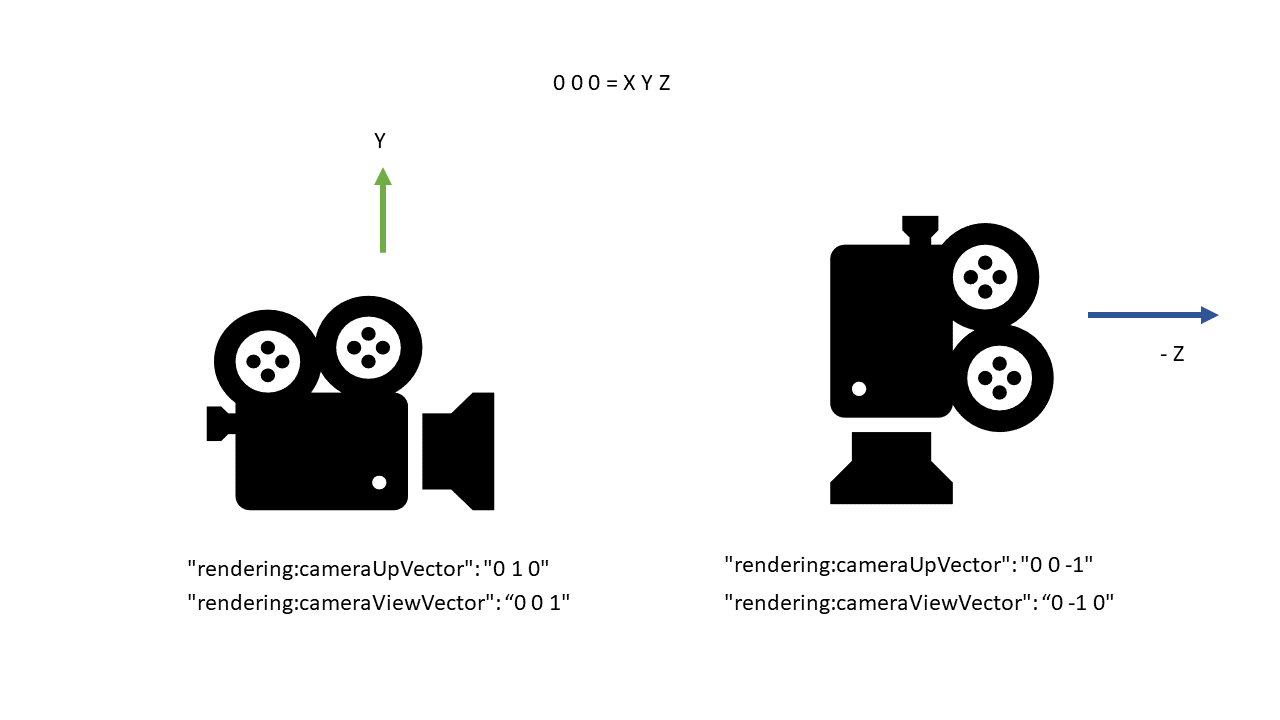
If no view matrix is explicitly set, the model is rendered with the camera fitting to the scene, looking along the negative z-axis (if the system was not rotated). The following settings set the camera Up and View vector in order to properly align the camer without usage of a view matrix:
| Name | Type | Default | Valid Range | Quick Description |
|---|---|---|---|---|
| rendering:cameraUpVector | String | 0 1 0 | camera up direction for rendering | |
| rendering:cameraViewVector | String | 0 0 -1 | camera direction vector for rendering |
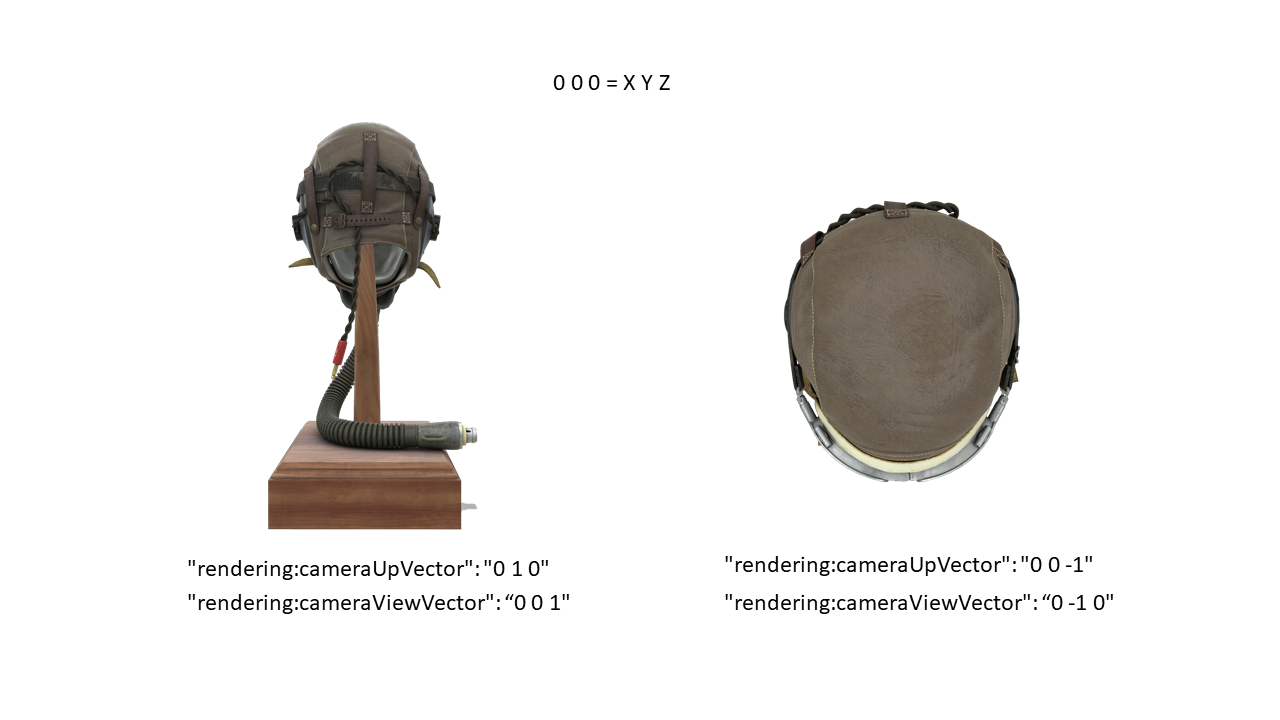
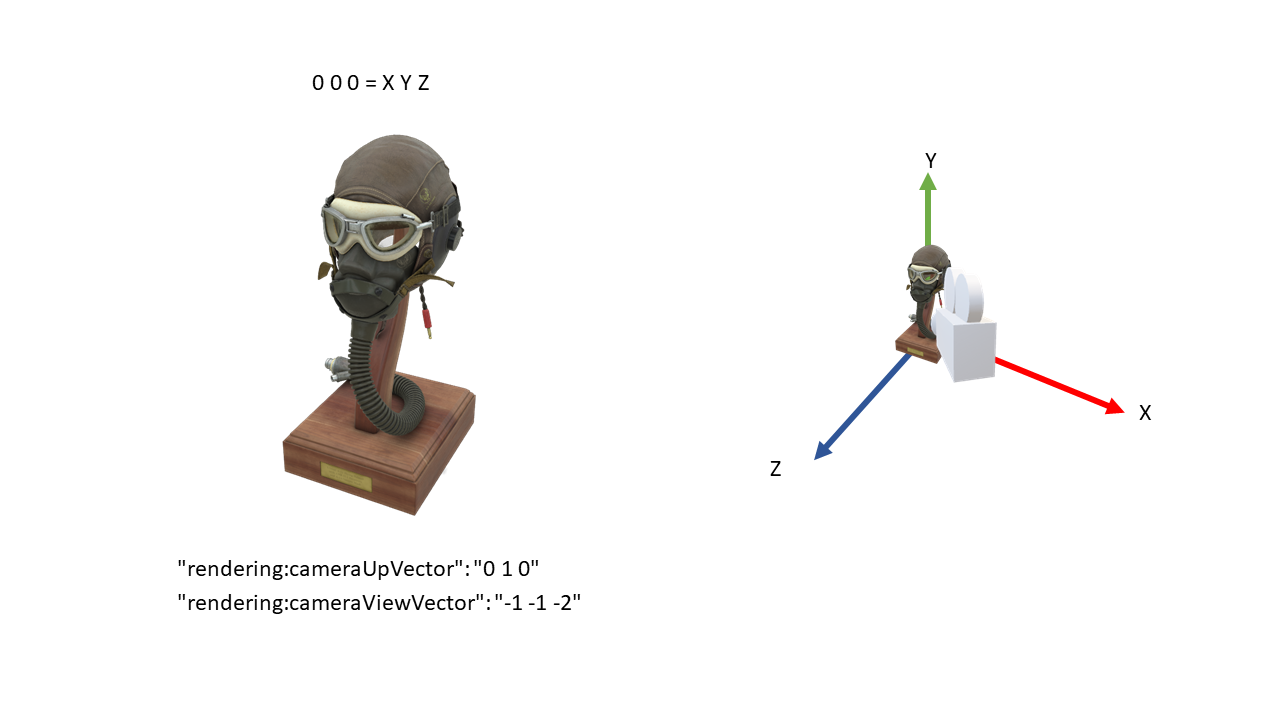
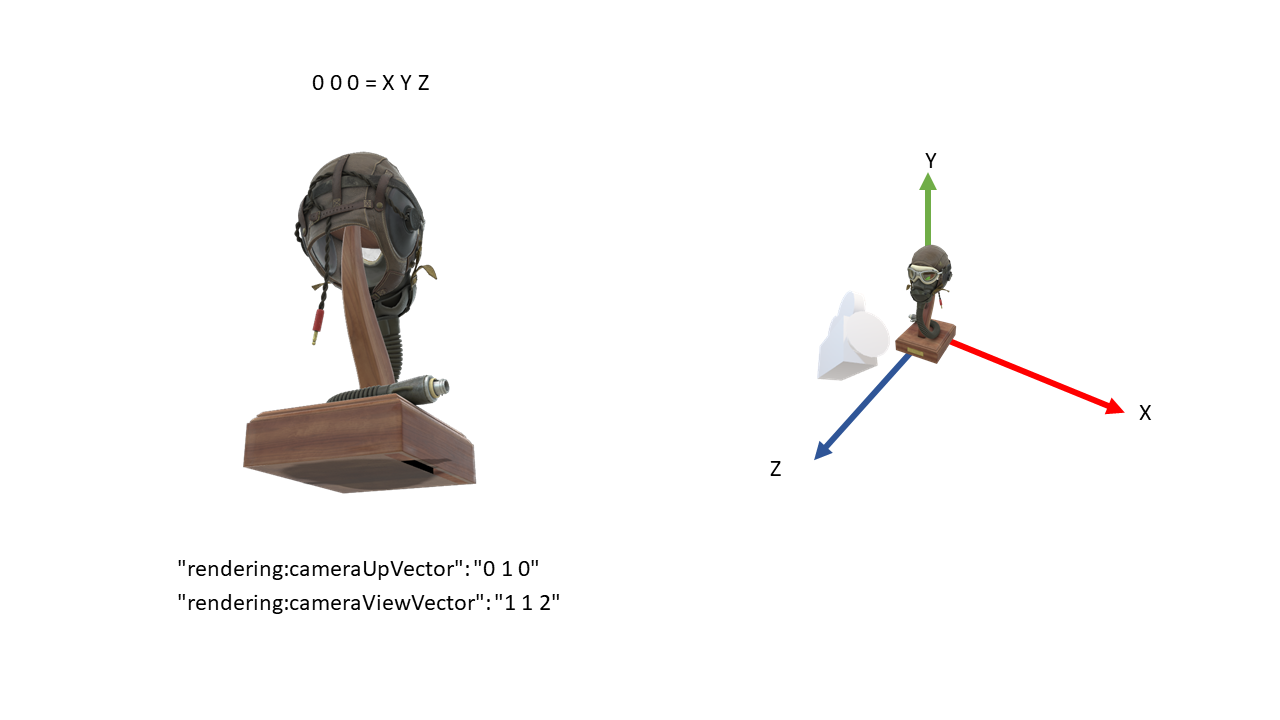
The following examples show how the camera settings affect the rendered images.