Within this tutorial, we are going to use RapidCompact CLI to simplify a textured 3D mesh with UV coordinates. Within the previous tutorial, you have seen how RapidCompact can be used to simplify an untextured mesh, and how the different settings affect the result.
Given a high-resolution textured mesh, there are basically two ways to produce a low-poly version that is textured as well.
We will now use the first method, UV-preserving decimation, on a simple example mesh of a scanned pharao bust (courtesy of CultLab 3D), which you can download here. There are two related decimation setting where we need to make sure that they are switched on:
| Name | Type | Default | Valid Range | Quick Description |
|---|---|---|---|---|
| decimation:preserveUVs | Flag | false | {true, false} | preserves texture coordinates during decimation |
| decimation:preserveMaterialBorders | Flag | false | {true, false} | preserves mesh material borders during decimation |
Try now to use the UV-preserving decimation on the pharao model:
rpdx -s decimation:preserveUVs true -s decimation:preserveMaterialBorders true -i .\Tutanch_scan.obj -d f:5000 -e result/5K.obj
RapidCompact CLI will generate a simplified version, and the output textures will match exactly with the input ones (in fact, one can use the same images for both versions of the model, which may be one reason to go with UV-preserving simplification).
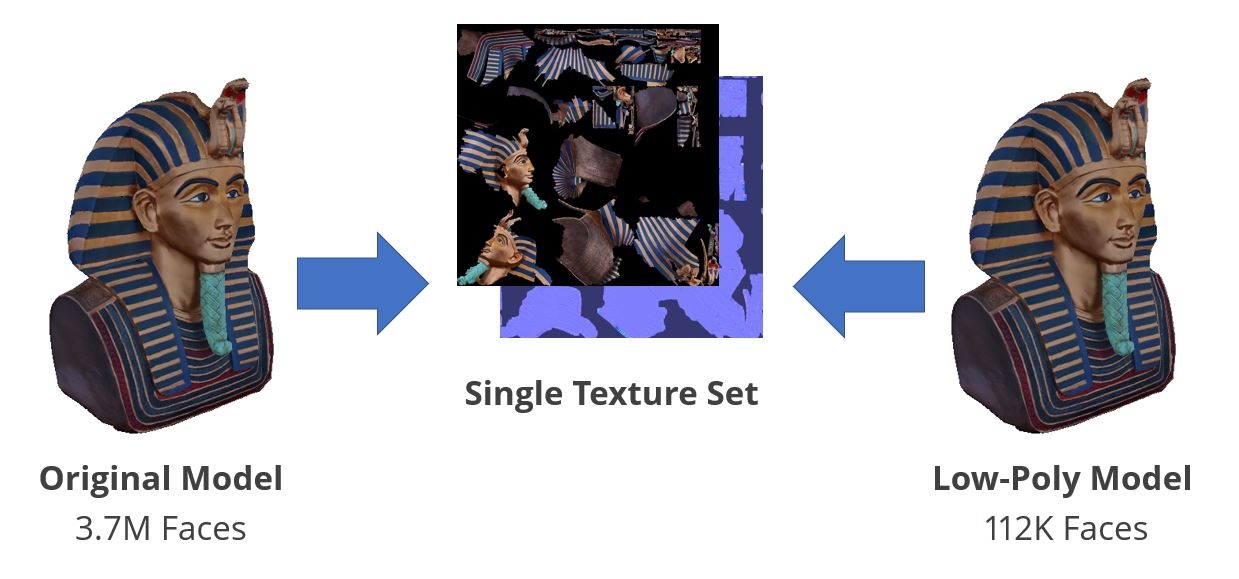
However, you may realize that the output model does not have 5,000 faces, although we requested that - instead, the model has still more than 100,000 faces left after decimation! RapidCompact also provides us with two warnings:
    WARNING: Could not reach the decimation target. Final face count 112174 (2%).
    WARNING: The original normal maps may look incorrect on the decimated asset.
Let's have a look at both of these warnings and see what has happened, and why.
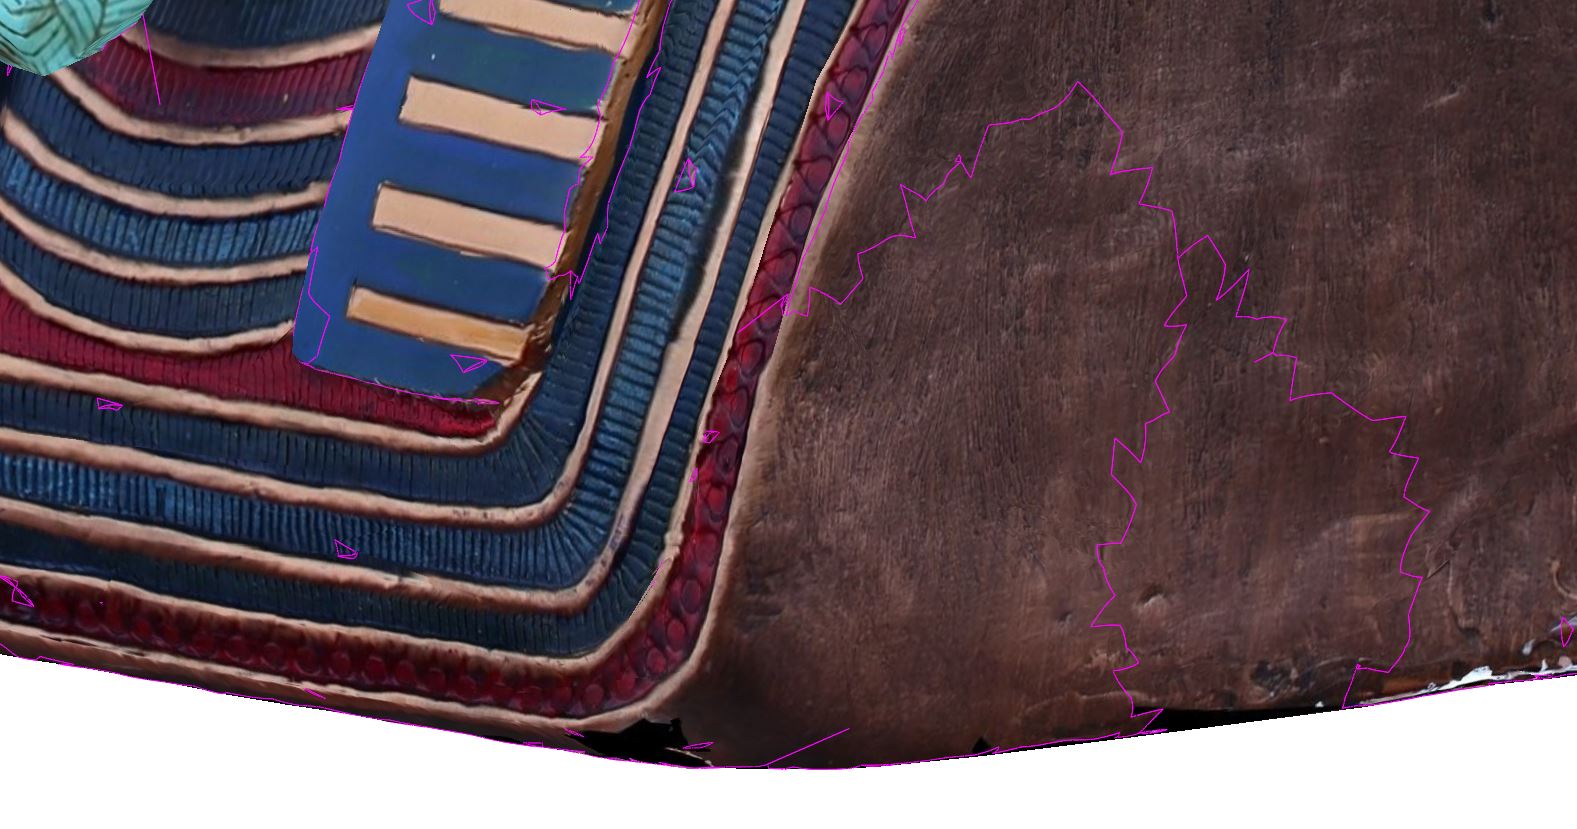
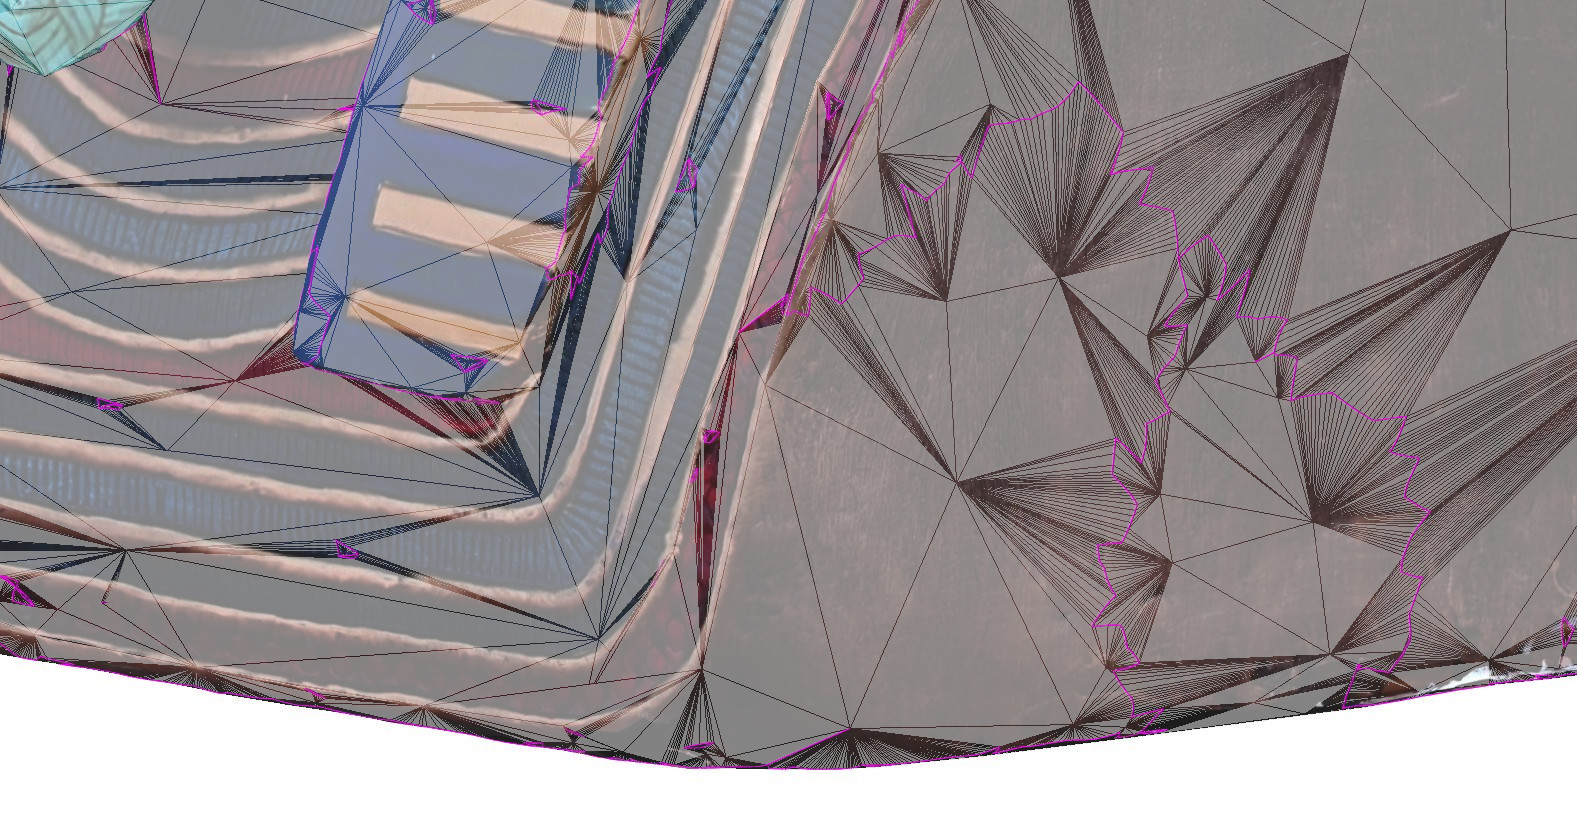
There is basically no alternative to a result like this, as long as we decide that we want to use the original model's texture on the lowpoly output model as well. As mentioned in the beginning, there is an alternative if we allow ourselves to resample the texture content into new images, which effectively allows RapidCompact to simplify the shape of the boundaries in the texture atlas as well (method covered in the LOD tutorial).
In the above example, we also saw a warning about normal maps, stating that original normal maps may look incorrect on the decimated asset. Why do we see this warning, and what does that imply for the result? In a nutshell, the problem is only relevant for tangent-space normal maps, and it only occurs if the tangent spaces of the low-poly model vary significantly from the tangents of the original high-res model. Tangent spaces consist of normal, bitangent and tangent, and the latter two are typically derived from UV coordinates. While the UV-preserving simplification algorithms tries to keep the position and orientation of the UV content as it is, the mesh normals of the low-poly version may differ from the high-poly ones, and hence the tangent spaces may be slightly different. In many cases, the effect on the rendered, normal-mapped model is not notable. However, it may happen that a visible difference occurs. In such cases, one can use RapidCompact to explicitly bake a new normal map, sampling the content from the input normal map and mapping it into the correct tangent spaces of the low-poly version.