In this tutorial, we are going to use RapidCompact to optimize a 3D model and export it directly to the usdz format for instant display in any AR or 3D Viewer on iOS or direct usage in ARKit. Note that you will be able to convert any currently supported file formats to USDZ using RapidCompact.
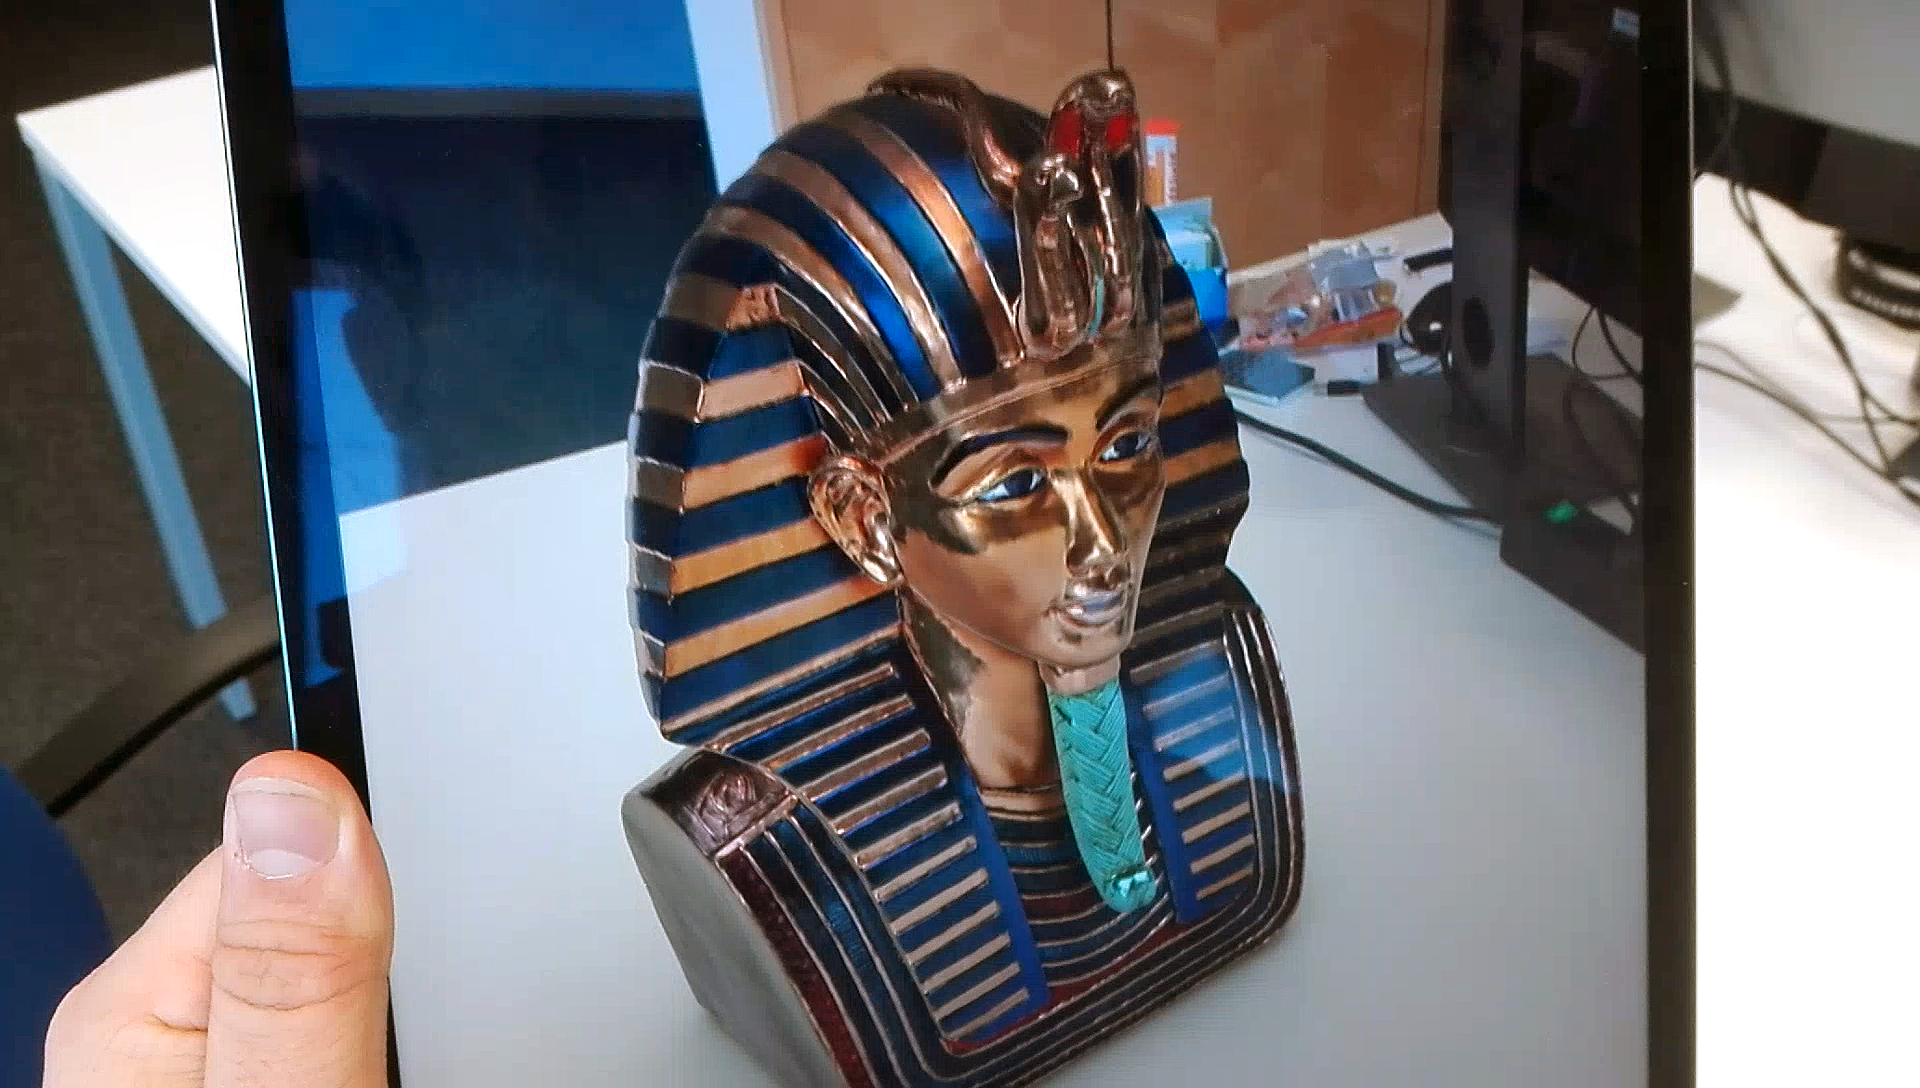
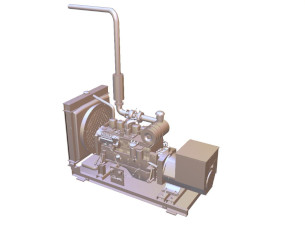
If you have a device with iOS 12, such as a recent iPhone or iPad, you should be able to simply view one of the following assets in AR by tapping on one of the following links (Diesel Engine from CadNav, Shoe and Tutanch models courtesy of CultLab3D; This website checks if your browser supports direct viewing with USDZ):

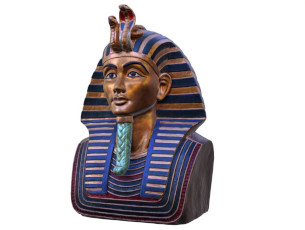
In the following, we'll see how to create such an embeddable AR experience, using RapidCompact. Let's start by downloading the original mesh file here.
As you can see the downloaded file consists of the scanned mesh file as well as the respective textures. While having all files in the same directory, just execute the following command with the RapidCompact CLI:
rpdx -i Tutanch_scan.obj -c -e Tutanch_compact.usdz
rpdx -i Tutanch_scan.glb -c --scale 100 -e Tutanch_compact.usdz
You now should have a compact version of the scan in the USDZ format and in the right scale. If there is a need to check the result first, feel free to convert the model to another format first, but keep the scaling differences in mind (see tip box above). In this case we converted the model into glb as explained in the previous Tutorial and exported it using the -w command for embedding in a Web page, or - if you prefer a graphical, configurable tool - use the Turner 3D configurator to create your custom 3D web viewer. In this case we used the Turner 3D to configurate also the link to the creator of the original 3D scan. Your resulting compact model should now look similar to this version:
USD, short for Universal Scene Description, is a 3D format by Pixar. The USDZ file format is a format for displaying and sharing USD 3D content natively in iOS and platforms that use the USD runtime. Here is a link refering to the official introduction of the USD format by Pixar.
Currently, a USDZ file can contain a USD file, material specifications and texture images (a list of supported files can be found here). With RapidCompact, USDZ files can be written from inputs with PBR Materials and one or multiple input textures, for example resulting from a 3D scan. RapidCompact will also interpret material properties in form of .mtl files or as a part of an input glTF file and convert them into the proper internal format for USDZ. We recommend to use PBR-based materials or textures for the USDZ format to get the best possible visual result. Especially for AR visualizations with the iOS AR-Viewer or custom apps build with ARKit, PBR materials can be very beneficial to the overall quality with a realistic material behaviour in combination with (real-time updated) environment lighting.
In addition to the possibility of using USDZ files in ARKit or other software and platforms supporting the format, there is a very simple and easy-to-setup way to directly display USDZ files in AR on an iOS 12 device. In the following we will set up a simple example HTML snippet to directly access your USDZ files through the tap on the link or button on your Web page. USDZ the sample USDZ and image file here. The html code directing to the USDZ file could look similar to this:
    <head>
    </head>
    <body>
        <div>
            <a href="directory/sample_file.usdz" rel="ar">
                <img src="sample_image_file.png" alt="" width="300" height="300">
            </a>
        </div>
    </body>
The most important part here is in line 5: the rel="ar" attribute indicates that the link attached to the image is refering to content usable with the iOS AR- Viewer and also indicates the usibility with a cube- logo layed on top of the used image file (iOS device only).
When hosted over a Web server, the resulting image embedded to the website should now show the image and, in addition, if displayed on an iOS device, a small badge showing a 3D cube should appear in the top right corner:

More information on how to correctly embed USDZ files can also be found in the Webkit blog.
< previous page next page