Within this tutorial, we are going to use RapidCompact CLI to unwrap a 3D mesh. This means we will generate a 2D UV layout, which can then be used to texture the model, for example.
RapidCompact CLI has two settings that can be used to control the unwrapping process:
Mesh Unwrapping
| Name | Type | Default | Valid Range | Quick Description |
|---|---|---|---|---|
| unwrapping:cutOverlappingPieces | Flag | true | {true, false} | turns removal of UV self-overlaps through cutting on/off |
| unwrapping:maxAngleErrorDeg | Real | 114 | {0 .. inf} | the maximum angle (degrees) difference between UV and 3D space beyond which a chart is split and re-unwrapped |
| unwrapping:method | String | isometric | {'isometric', 'forwardBijective', 'fixedBoundary', 'fastConformal', 'conformal'} | method to be used for UV unwrapping |
In addition the RapidCompact CLI comes also with settings for other important UV- related topics such as segmentation and packing:
Mesh Segmentation
| Name | Type | Default | Valid Range | Quick Description |
|---|---|---|---|---|
| segmentation:maxPrimitivesPerChart | Int | 10000 | {1 .. inf} | limits max number primitives in any UV chart |
| segmentation:chartAngleDeg | Real | 130 | {0 .. 360} | threshold (degrees) for overall curvature of 3D charts |
| segmentation:cutAngleDeg | Real | 88 | {0 .. 180} | threshold (degrees) for cutting sharp edges |
Chart Packing
| Name | Type | Default | Valid Range | Quick Description |
|---|---|---|---|---|
| packing:pixel_distance | Int | 2 | {1 .. inf} | distance in pixels packing will keep at reference packing resolution |
| packing:resolution | Int | 1024 | {0 .. inf} | resolution at which packing will be computed |
To get started with the unwrapping functionality of RapidCompact CLI, we will use a simple example mesh of Victor, which you can download here. Victor is a simple 3D bust of a character, a manifold 3D mesh that has three boundary loops: a large one at the neck, and two smaller ones for the holes that were left for the eyes.
In order to be successfully unwrapped, a 3D mesh must have only 2-manifold edges, which means that there may never be more than two faces connected to a single edge (otherwise, generating a non-overlapping 2D UV layout would be impossible). Furthermore, the mesh must not have handles - a simple counter-example would be a mug with a handle. Meshes with handles are also impossible to unwrap in 2D without overlaps, given that they are not cut. We will use the Victor example, which is already manifold and has no handles and create a simple UV layout:
rpdx -i victor.obj -u -e victor-uv.obj
This command will generate an OBJ file victor-uv.obj, containing the input mesh with UV coordinates. There will be several islands in UV space, since this method will have produced some overlaps, and since the flag unwrapping:cutOverlappingPieces is enabled by default.
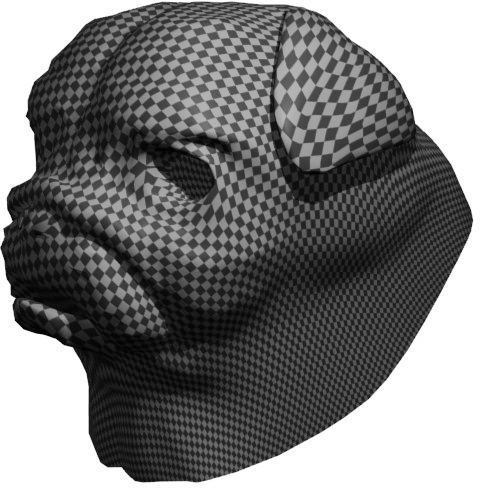
We will now turn overlap removal off and compare the results for all available methods. To visualize the stretch on the 3D surface, we will also assign a simple checkerboard texture. Try now the following command:
rpdx -i victor.obj -u --set_checker_texture -e victor-uv.obj
This will produce a textured 3D mesh in OBJ format, which should look like the following:

Using the default method isometric this result looks already quite nice. However, as we have disabled overlap removal, it can contain UV overlaps (and it does, in this case). If having UVs without overlaps is not important for your application, this might be OK. However, if you would like to have UVs without overlaps, without segmenting the model further, RapidCompact CLI also has a solution to offer. If stretch is not relevant, but it is only relevant that no overlaps occur, you can use the very fast fixedBoundary method, which pins the largest boundary (in this case the one around the neck) to a circle. Finally, in order to obtain a well-balanced result with minimum stretch and without any overlaps, you can use the slower, but high-quality forwardBijective method. The following figure and table shows an overview of the results generated by all available methods. Click the small images to see a larger version.