
In this tutorial, instead of simplifying a 3D mesh, we will use the RapidCompact CLI to remesh a 3D model entirely, using the quad remeshing feature. Quad remeshing can be beneficial in cases where a subdivision workflow is used, and where the UV Atlas as well as the general shape should be preserved at different refinement levels.
Currently RapidCompact CLI has one remeshing setting that can be used to switch between quad-only and quad-dominant remeshing:
Remeshing
| Name | Type | Default | Valid Range | Quick Description |
|---|---|---|---|---|
| remeshing:quadDominant | Flag | false | {true, false} | switches remeshing from creating quad meshes to quad dominant meshes |
We will explore the effect of this setting later within this tutorial. But first, let's have a look at how the quad remeshing feature works.
To get started with the remeshing functionality of the RapidCompact CLI, we will use the exact same example mesh of the nefertiti bust from the Simplifying Tutorial, which you can again download here in case you need it.
To generate a remeshed version of the nefertiti bust, you can use the following command line:
rpdx -i nefertiti.ply -r 0.25% -e nefertiti-lowpoly.obj
In order to generate a remeshed version with new UVs and color texture baked onto the low-poly mesh from the original data, you can use the following command line:
rpdx -i nefertiti.ply --duplicate -r 0.25% -u -b -e nefertiti-lowpoly.obj
This command will generate an OBJ file named nefertiti-lowpoly.obj, containing the remeshed version of the input mesh. In addition the mesh gets unwrapped and texture maps for color and normals get baked form the original data (which we first saved on the stack using the duplicate command). The remesh command, here abbreviated using the shorthand version r, accepts several parameters. By default, a number is interpreted as a target amount of vertices. However, you can also specify a target amount of faces, or a target percentage of vertices or faces. Examples:
It is noteworthy that the target amount of faces of the remesh function corresponds to the desired amount of quads, in contrast to the target values for the compact or decimate commands, which are supposed to be the desired number of triangles. When triangulating a quad mesh, the resulting model will have as twice many triangles as there were quads, since each quad will be split into two triangles. In addition, before remeshing a model, RapidCompact deletes duplicated vertices by default to ensure a better outcome for meshes with intersections and mutliple geometries.
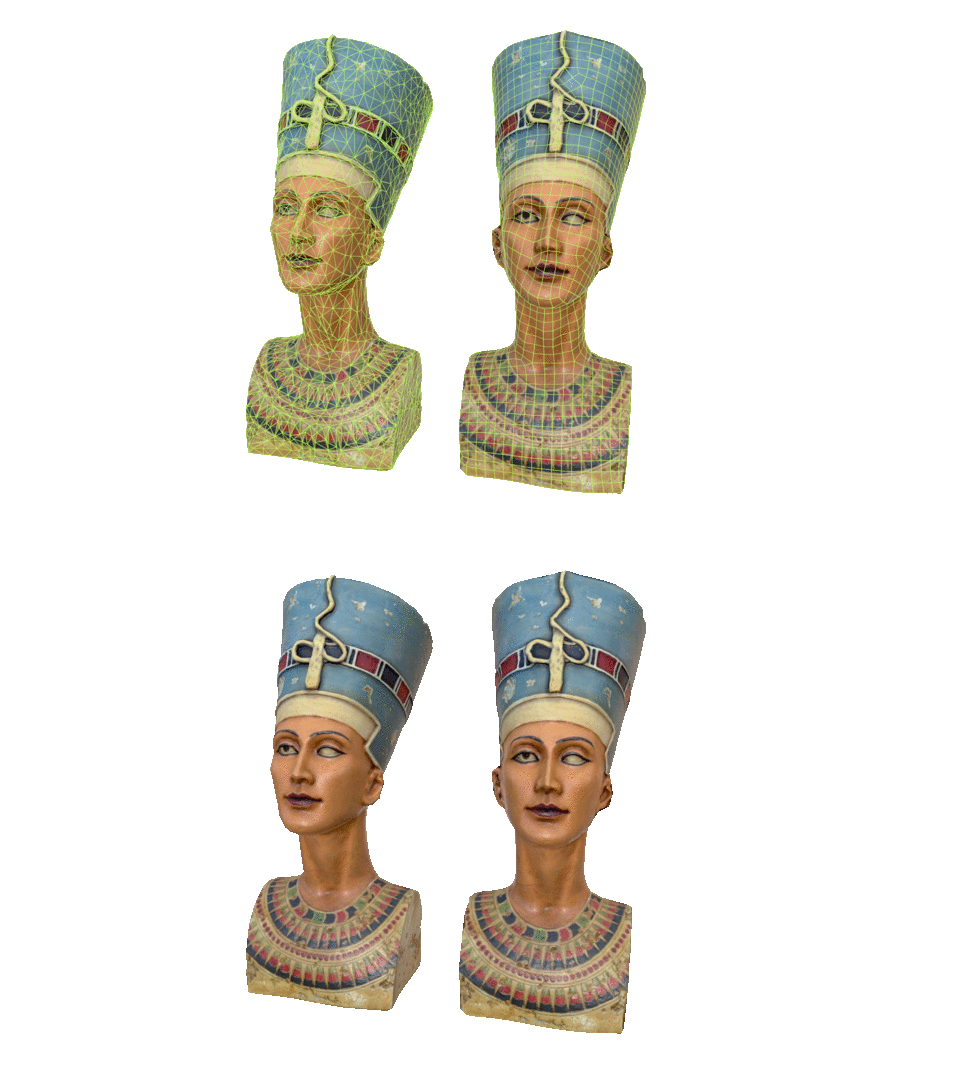
The figure above shows a comparison of the results from a decimated and a remeshed version of the Nefertiti model, using a strong simplification to 0.25% of the original vertices. Note that the silhouette of the meshes differ quite a bit, comparable to the difference of the two simplification methods quadric and edgeLength of the previous tutorial. In the following we will adress that issue and also look at the quad-dominant method for remeshing.
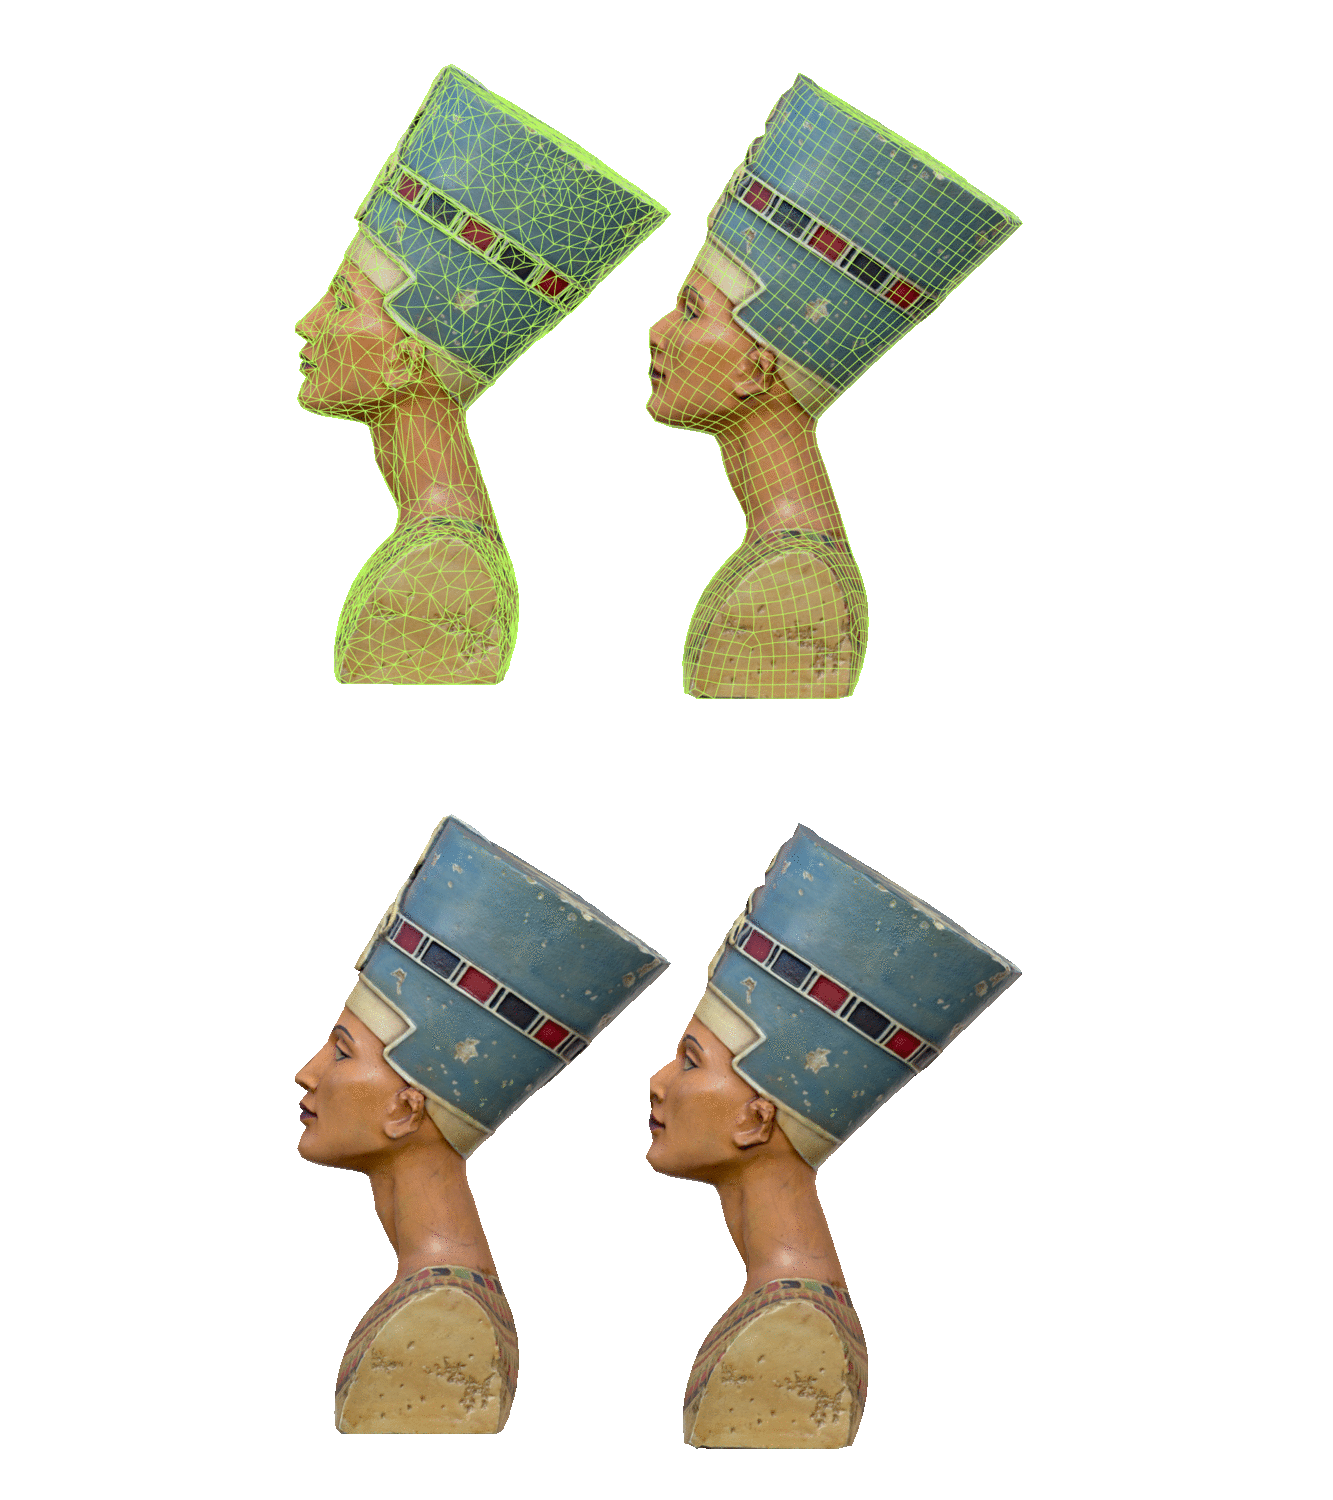
The models and especially the baking look quite similar if comparing with the result from compact or decimate commands. However, at a closer look, in this case by observing the profile of the bust, there are some substantial differences in the silhouette. Currently, there are two ways of dealing with suboptimal results:
rpdx -i nefertiti.ply --duplicate -r 1% -u -b -e nefertiti-lowpoly.obj
And here is the result:
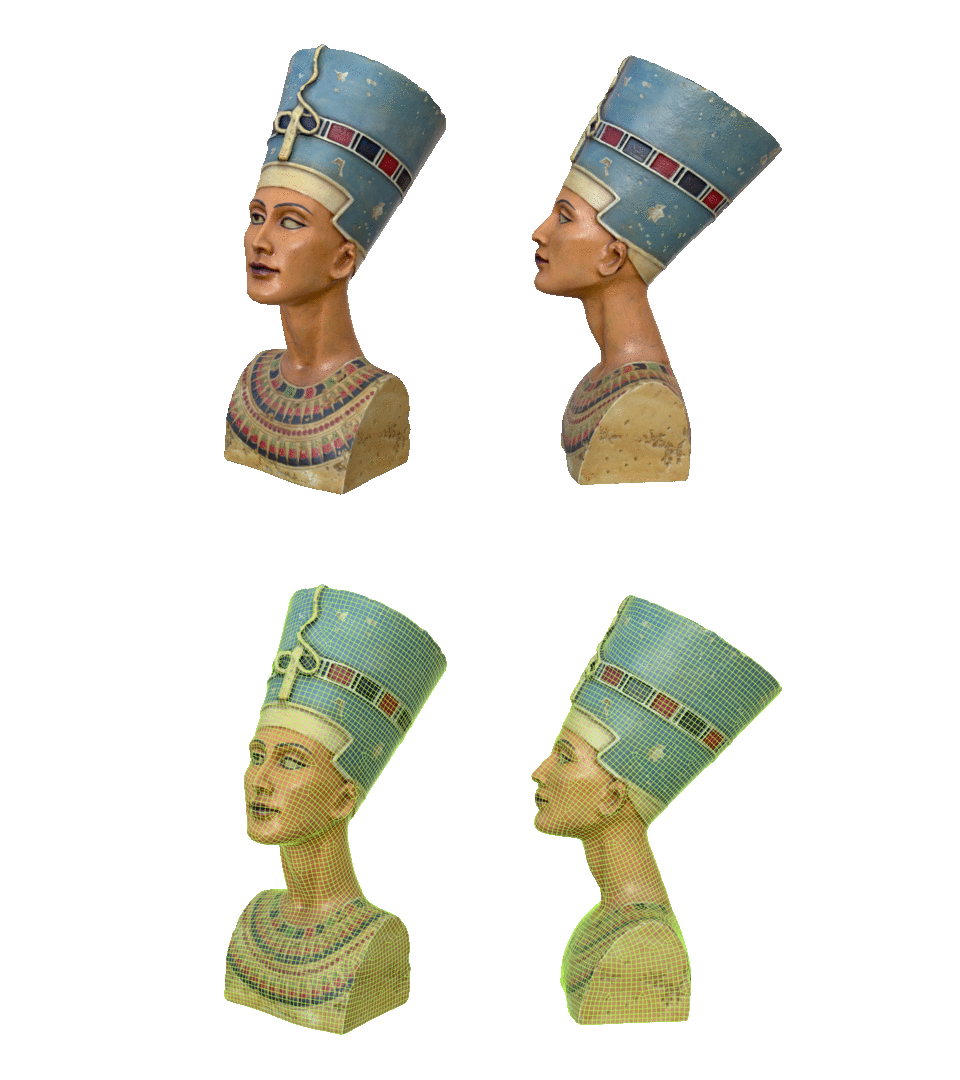
Using the remesh command with a higher target value will produce a result similar to the model above. As you can see the Model has a way better silhouette by still only using 1% of the input polygons.
The second method can be very useful for situations where the quad-only method has limitations. To illustrate such a limitation you can download this sample model of a scanned shoe here.
Use the following command with the shoe model:
rpdx -i shoe.obj --duplicate -r 5% -u -b -e shoe-lowpoly.obj
Your result should now look similar to this:
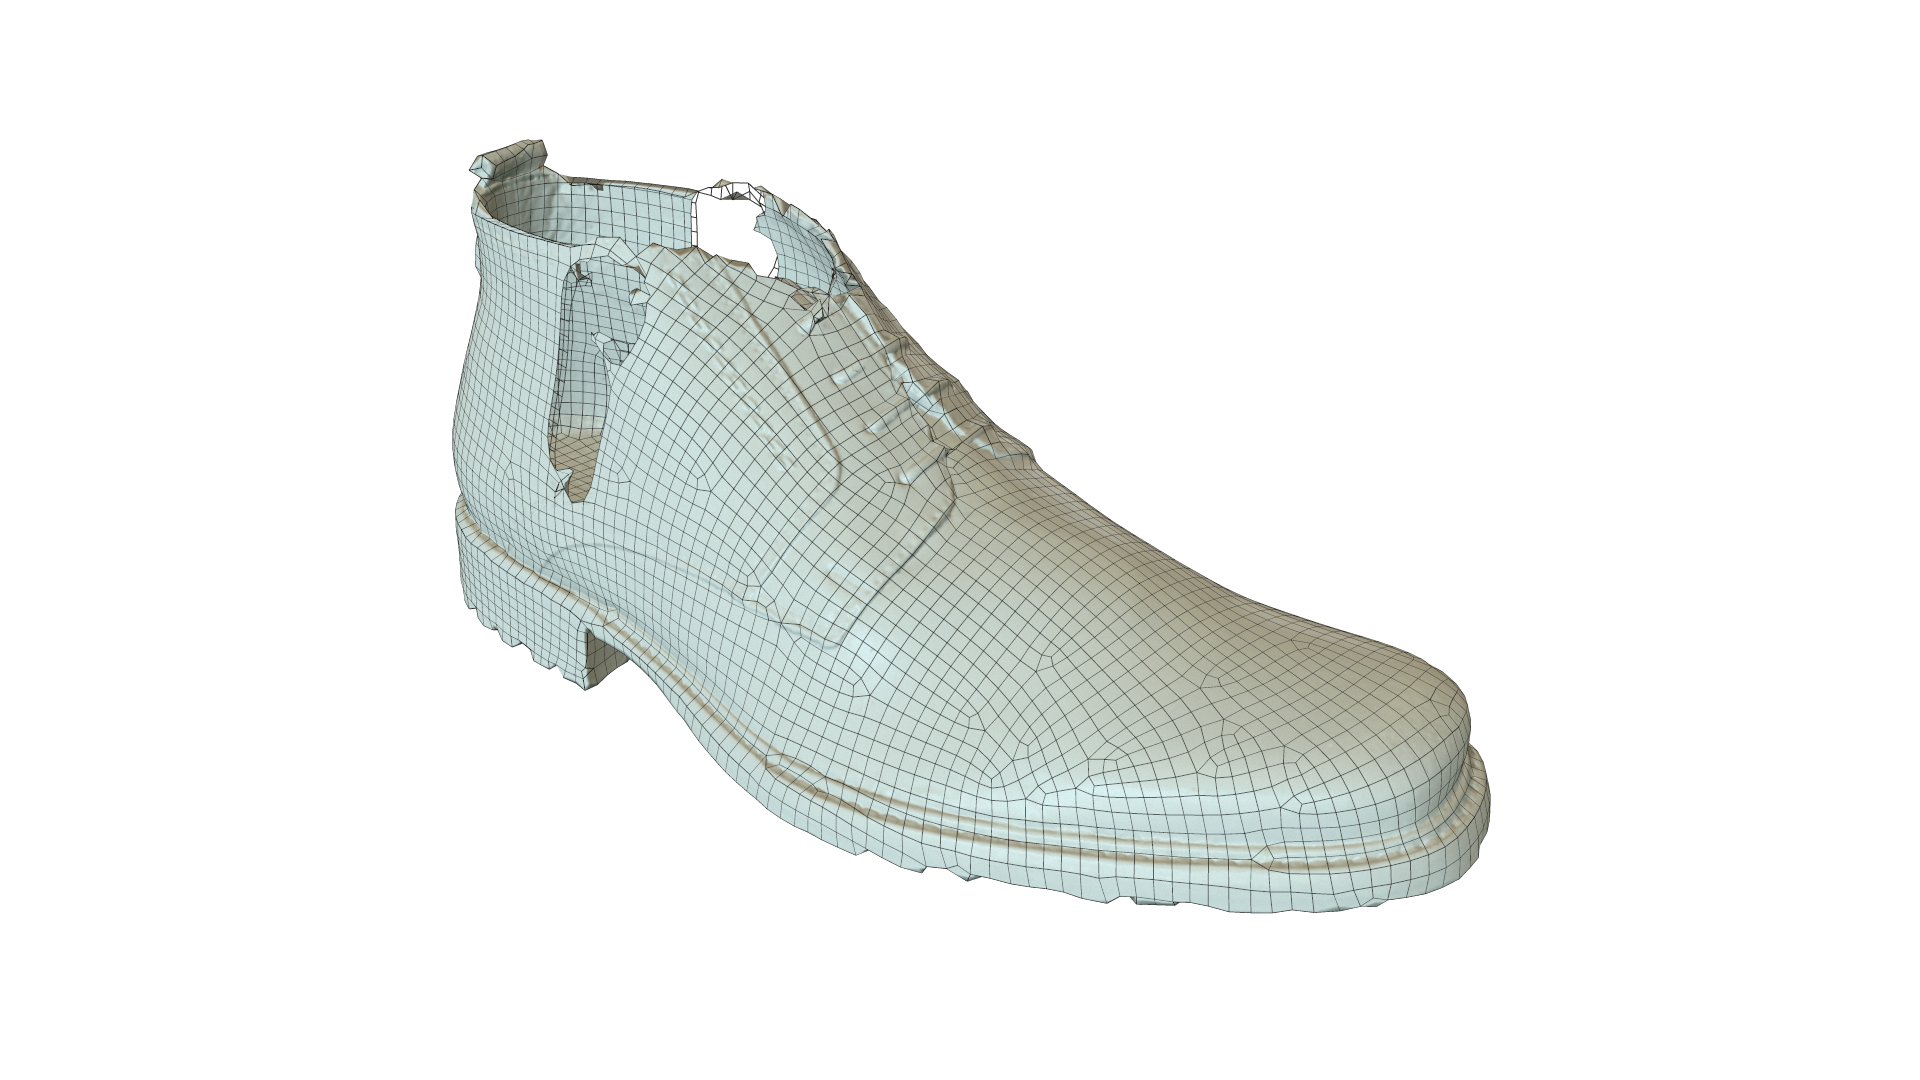
As you can see, the remesh command using the quad-only method has run into problems with the thin "walls" of the shoe. In order to fix that let us now set the method of the remesh command to quad-dominant, example:
rpdx -i shoe.obj -s remeshing:quadDominant true --duplicate -r 5% -u -b -e shoe-lowpoly.obj
The result should look much better:
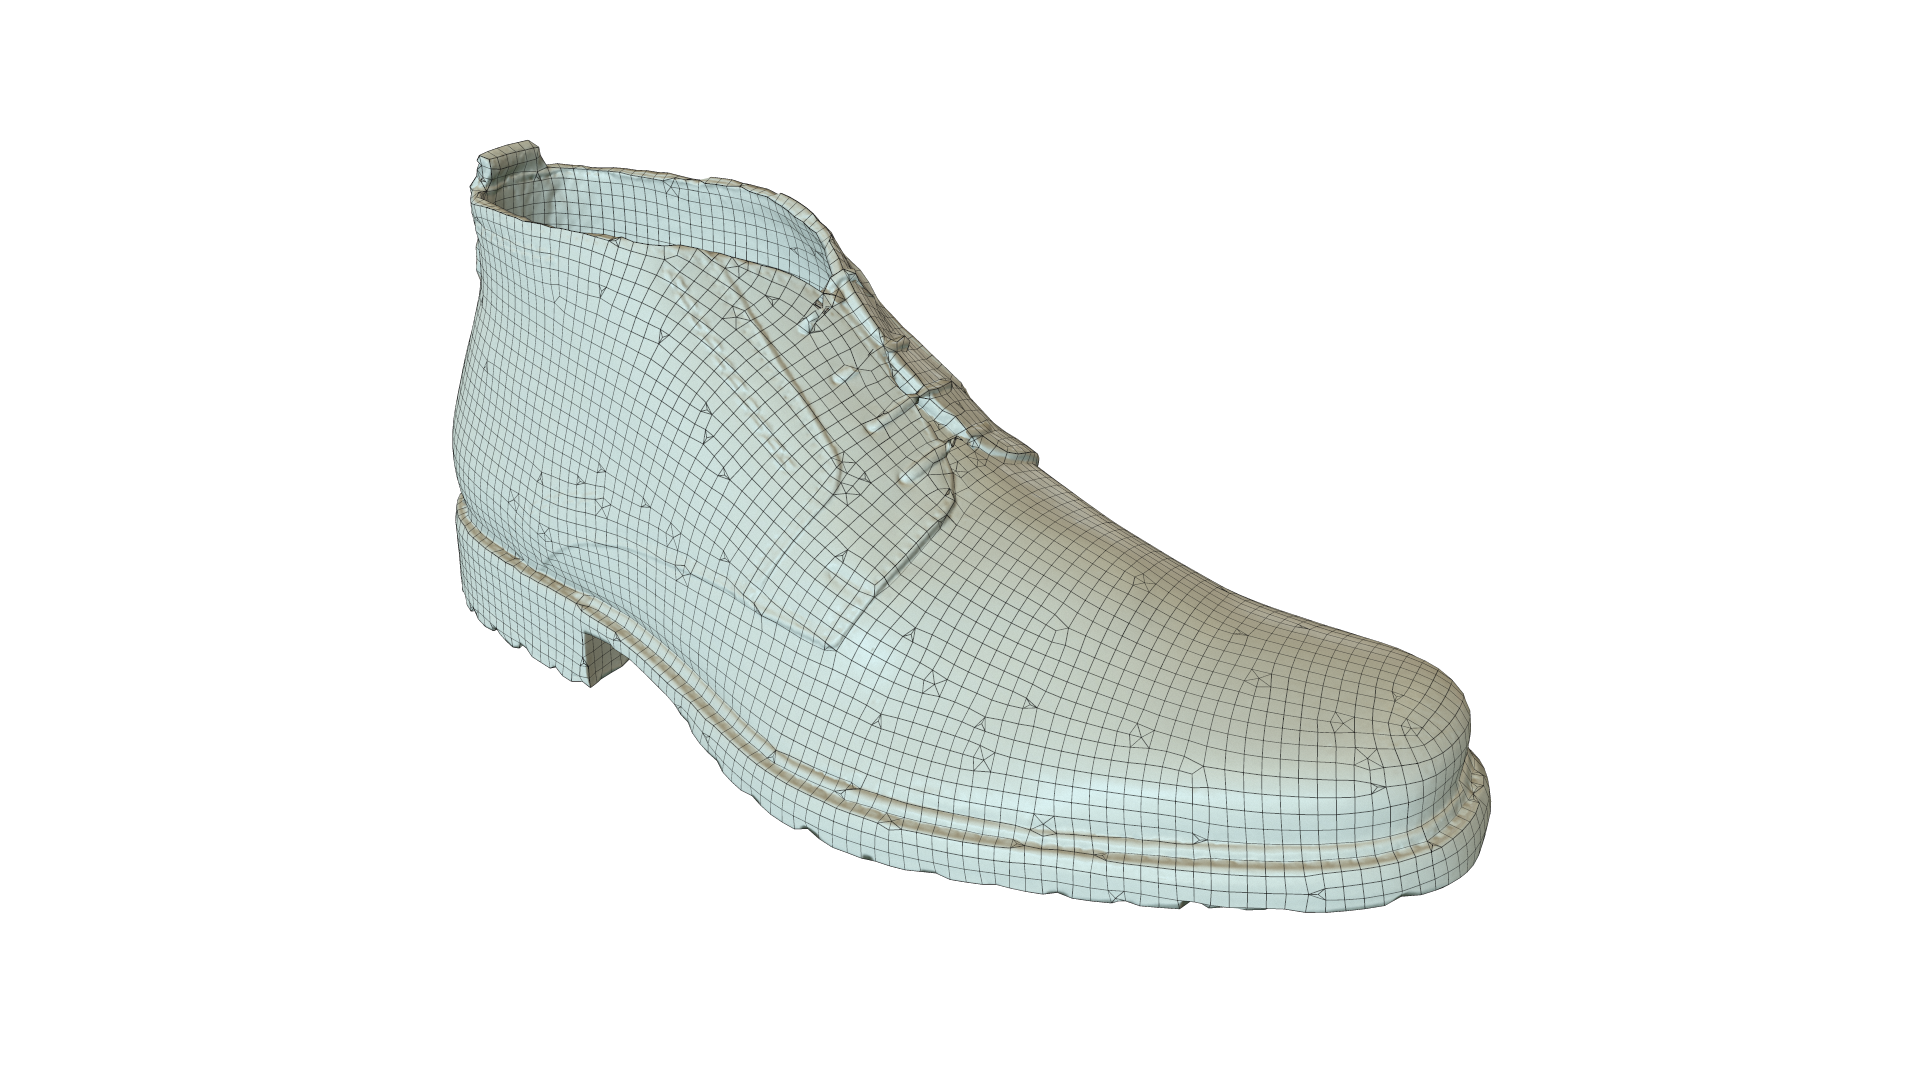
As you can see, the quad-dominant method can provide better results in cases like this by also adding in triangles into the quad flow. However, the default setting is still set on quads only and will be improved further within the next RapidCompact updates. Until then, you can use the quad-dominant method as a fallback where in case the result of the quad-only remeshing should not be satisfying.
You could see, following this tutorial, that the remeshing of the RapidCompact CLI is a neat feature for specific workflows making use of quad meshing and subdivisions. However, for mobile or Web-based visualization with very optimized low-poly models, the decimation methods are far more optimal. The following figure shows a detailed comparison of the head area of the Nefertiti model. Even though the baking worked flawlessly for both, on this low resolution the differences in silhouette and topology become obvious:
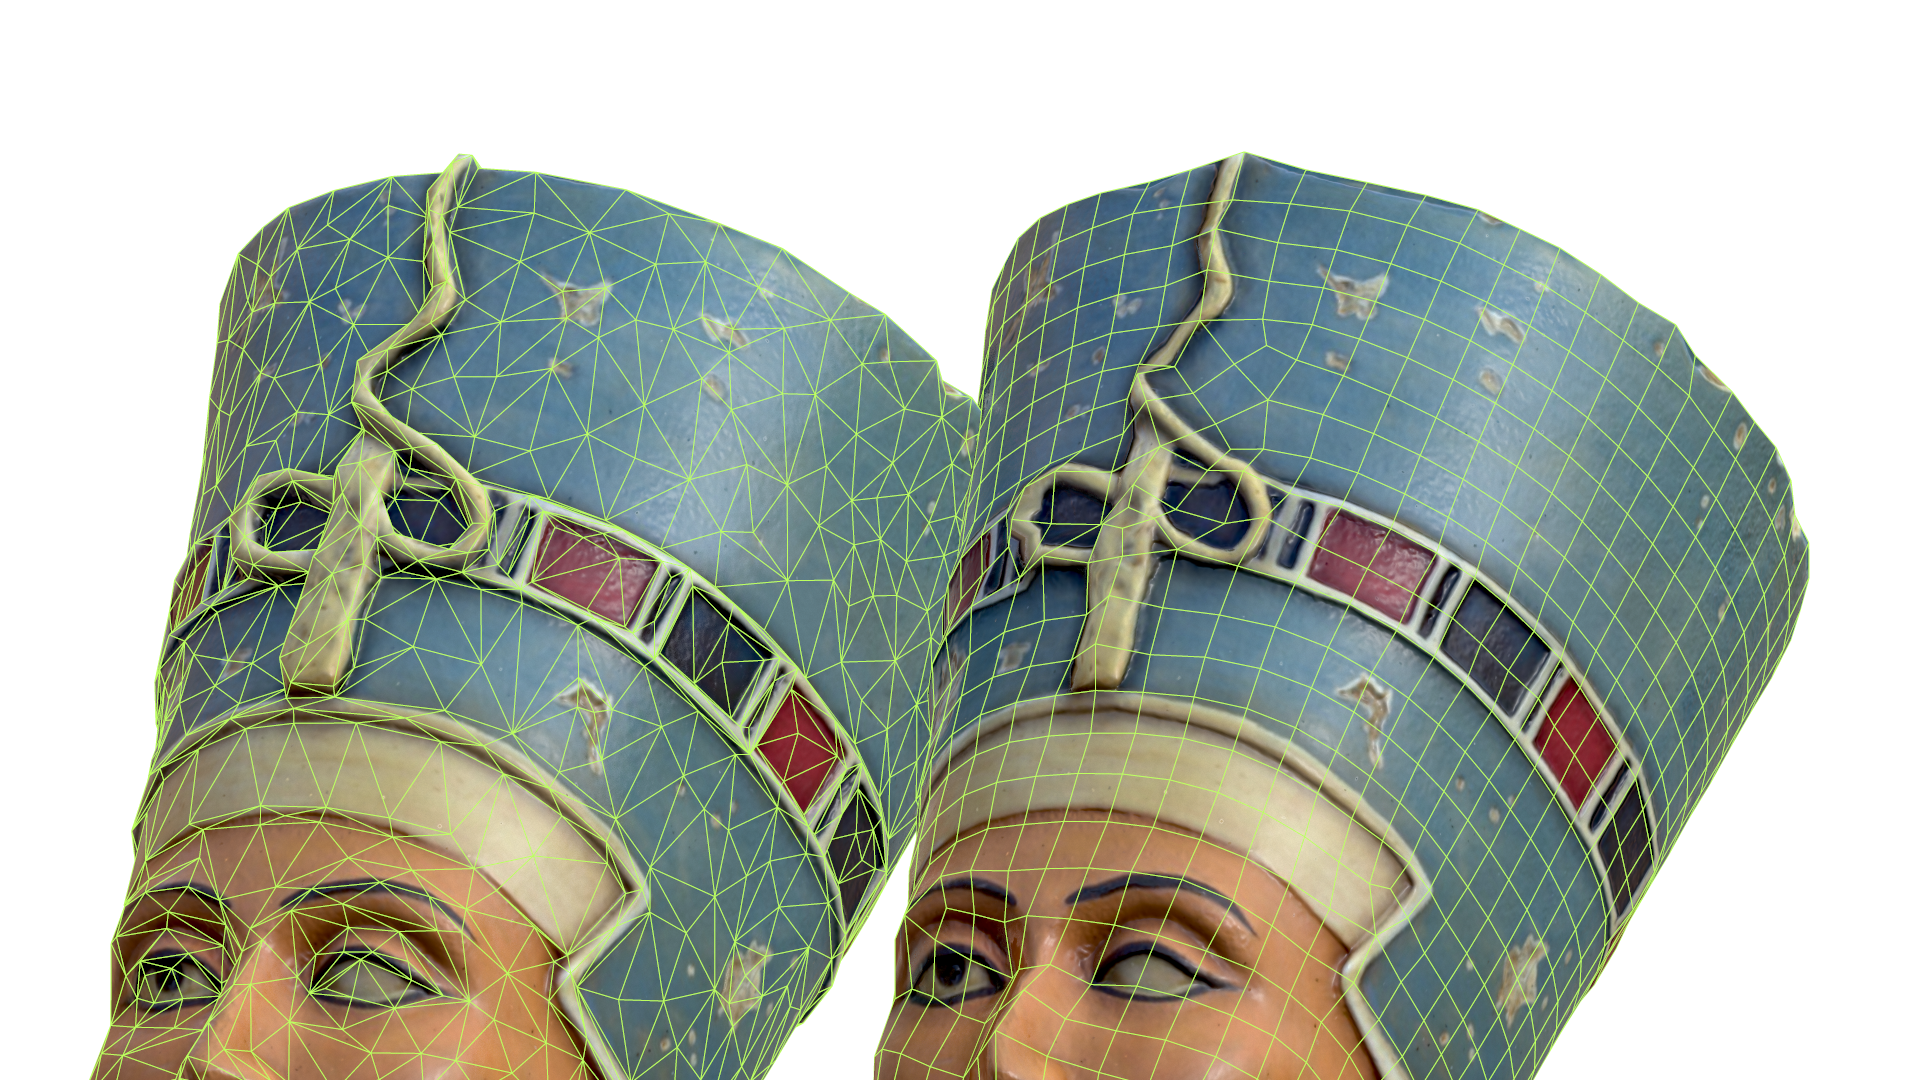
Especially the head ornaments of the Nefertiti model are good indicators for the difference between remeshing and simplifying. While the decimated model on the left preserves important topological features quite well, the remeshed variant on the right adds a very clear loop structure of quad meshes, at the cost of preserving details within the mesh structure.