Within this tutorial, we are going to use RapidCompact CLI in order to generate some texture maps, applied to a low-resolution mesh with UV coordinates, by extracting data from a corresponding high-resolution 3D asset.
We will use a scanned plastic bust of Nefertiti (courtesy of CultLab3D) as an example throughout this tutorial.
You can find the files here.
The process of generating maps for an asset that has UV coordinates is often referred to as baking, and we will use that term throughout this tutorial.
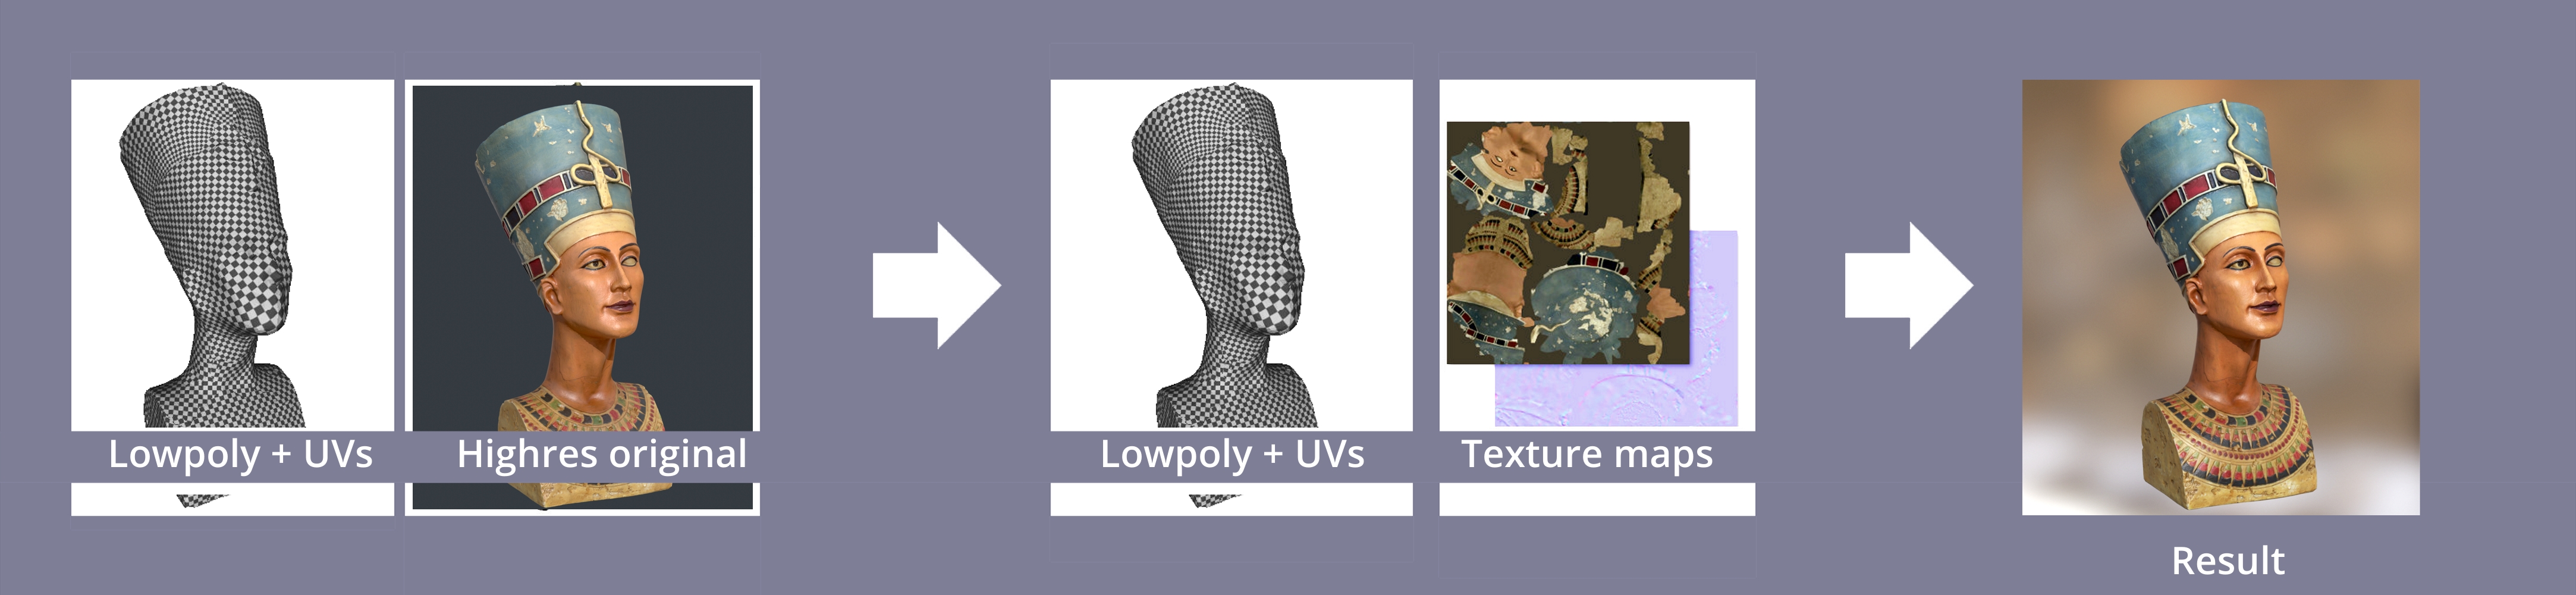
An basic overview of the baking process is shown in the following figure:
As shown in the left of the figure, baking needs an asset with UV maps, which is typically a low-poly mesh.
The data which should be used to generate the content of the detailed texture maps (such as surface normals, colors and occlusion) is typically a high-resolution original asset, for example a detailed 3D scan.
To generate a version of the UV-mapped low-resolution nefertiti mesh, using data from a high-resolution version with vertex colors, use the following command:
rpdx -i nefertiti-vcols.ply -i nefertiti-lowpoly-uv.obj --bake_maps -e baked/nefertiti.obj
This will create a directory entitled baked inside your current working directory, which will contain the baked maps and the respective textured asset.
Configuration
The baking process can be configured in several ways, with more than just a handful of parameters.
Therefore, to ease configuration, you may want to use a config file, instead of specifying all parameters you want to change via the command line (see
here for more information on configuration possibilities).
The most important baking-related settings are:
- baking:baseColorMapResolution, controlling the resolution of the baked base color map (similar: baking:normalMapResolution, etc.)
- export:baseColorMapFormat, controlling the format of the exported base color texture file (similar: export:normalMapFormat, etc.)
- baking:tangentSpaceNormals, switching between tangent-space / object-space normal maps
- ao:enabled, switching AO (occlusion) on/off
- inpainting:radius, specifying the radius of the inpainting around texture charts
There are also other settings for further tweaking. An example config file is packaged within the zip archive with the nefertiti assets. This config file contains all settings that are somehow related to the baking process. To employ it, simply use the following command line:
rpdx --read_config baking_config.json -i nefertiti-vcols.ply -i nefertiti-lowpoly-uv.obj --bake_maps -e baked/nefertiti.obj
Visualization
The exported asset with baked maps is now ready for visualization.
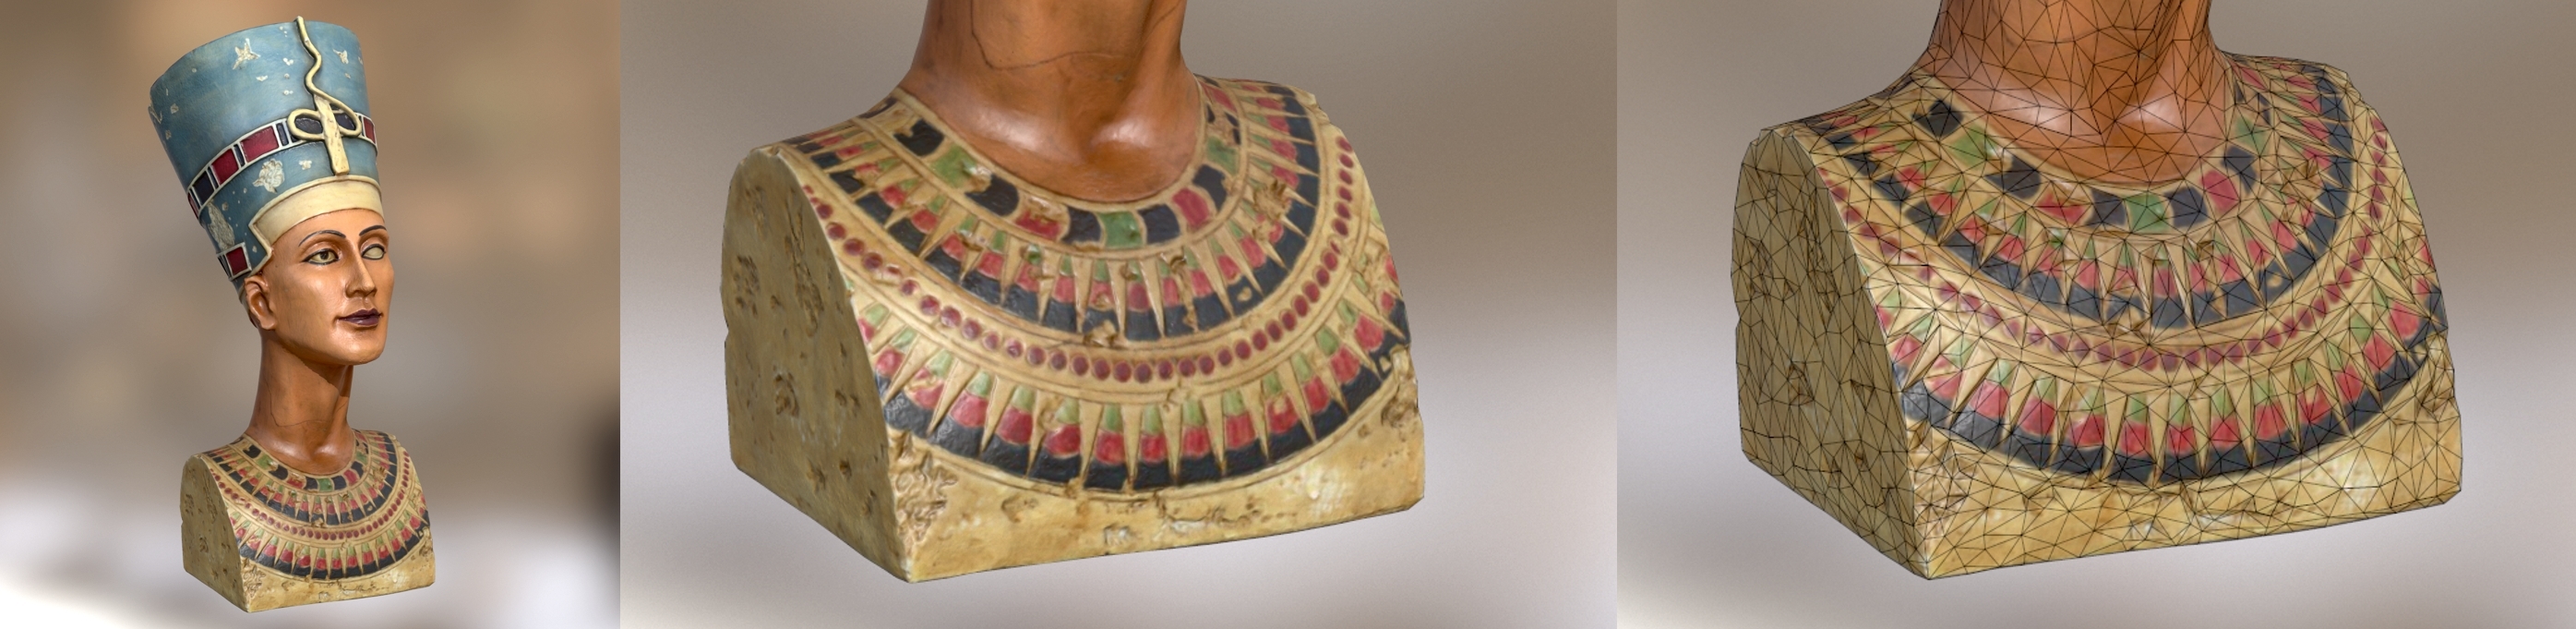
The following images illustrate how the details of the high-resolution mesh are preserved on the surface of the textured low-resolution asset (shown with wireframe on top in the rightmost image):
To visualize the result in 3D, you can zip and upload the web directory to any online platform. After adjusting the 3D settings and environment, your result will look similar to this example made with our own viewer solution:
Tutorial 3: Baking Texture Maps
< previous page
next page >